Post by: NoMad on January 14, 2019, 07:47:12 pm

When I went to pick up the car a quick check over showed that Charlie was right and the front tires were badly dry rotted. The rears were in acceptable shape so it was a quick stop next door to Mikes so I could get new fronts. Hate to spend money on tires that will be replaced almost immediatly as I am moving to 17" rims in the very near future so it can clear the 12" C4 rotors that will be installed soon.
Once I made it home I went ahead and pulled the blower motor and resistor so I could clean the accumulated debris in hopes of preventing a dash fire. Since the light was fading fast I opted to just take care of some initial clean up. The windows took quite a bit of scrubbing to pull all the black residues and dirt off the, both inside amd out. I also chose to break my usual rule and used some armorall wipes to clean the interior vinyl and plastics. I am not a fan but it was what I had on hand and it gave me a better idea of what needs what in the interior.
Tomorrow the car gets titled and plated so it can become my daily driver while sorting the small stuff. While I am out I plan to grab a new set of winder wipers so I can cope with all the rain we have been getting.
Also I have been cleaning and dielectric greasing every electrical connection I open while working on the car.
So far I have identified some need to fix items to start with before tackling any cosmetic work.
1 The horn is not currently functional. Not sure if this is a switch and column issue, wiring, or the horn itself. I will get on tracking that down as my first task. Never really needed the horn in Alaska but since moving here to Atlanta I find it a cheap insurance when people are texting or just plain not paying attention.
2 The trunk release is not currently working and I plan to remedy that sooner rather than later.
3. Keys. The trunk and door keys are currently different so I will want to fix that with a locksmith at some point.
4. Interior. Lots of small stuff like replacing the window switches and replacing cracked or warped vinyl and trim pieces. Top of my list is the cracked and broken window switches, the shift boot and knob, the the missing driver's side seat recline lever cover, seat covers or upholstery, the pegged tac and inop temperature gauge.
The bigger stuff is:
The brake upgrade that I am preparing parts for now.
17" wheels to accommodate the larger brakes
Change ALL suspension and stearing bushings and go through everything there with a fine-tooth comb.
Up in the air for me is to decide on if I will keep the formula body intact or complete the conversion to a GT. I know I want to change the look with new side intakes along the lines of the old fierofiberglass.com stuff om the orange GT at Mike`s shop. For now the car will stay in primer till I am happy with all the body mods.
Thank you again to everyone who was involved in the building of the car and repairs done by the club, I a, excited to be back into the fiero owners fold.
Post by: GTRS Fiero on January 14, 2019, 08:27:12 pm
It reads as if the car is in good hands.
Post by: Fierofool on January 14, 2019, 09:38:33 pm
I have a couple of fuel/temp gauges that you can install. I think the hand fell off your temp gauge.
I'm with you on the ArmorAll. A Mr. Clean Magic Eraser does a great job at cleaning the hard vinyl. Afterward, see if you can find some UV2 Protectant. It's a non-drying protectant. Has no chemicals that will dry and crack the vinyl, like ArmorAll.
On January 26, several of us are going up to ScottB's shop and cannibalize a parts car. There may be some window switches and trunk opener stuff, along with other things that you could get from him. This was a good car until a tree fell on it, so lots of stuff on it was still in operation.
When you make the conversion to the 17"s, those Formula rims with good tires should have no problem selling.
Post by: GTRS Fiero on January 14, 2019, 09:56:14 pm
Do you hear the relays click?
Post by: NoMad on January 14, 2019, 10:23:28 pm
Already a few hundred in on updated parts and really looking forward to making her sing soon.
Post by: Raydar on January 14, 2019, 10:26:21 pm
Interesting. The horn and trunk relays are the same part number.
Do you hear the relays click?
The horn and the trunk relays ARE interchangeable.
The horn relay is under the right side of the dash, between the heater box and the fenderwell.
The trunk popper relay is under the left side of the dash, to the right of the column.
Personally, I am quite a fan of the "Fastback Formula" look. Your car (years ago) was part of the inspiration for mine.
.JPG)
Post by: NoMad on January 14, 2019, 10:28:32 pm
Before I hit send on my Fierostore order how do I go about applying the discount for paid members?
Post by: GTRS Fiero on January 14, 2019, 10:31:36 pm
Already a few hundred in on updated parts...
Yep, and only day 1.
Post by: Raydar on January 14, 2019, 10:34:07 pm
Quote
author=NoMad link=topic=3449.msg34429#msg34429 date=1547522912
Before I hit send on my Fierostore order how do I go about applying the discount for paid members?
I don't think you can do it online.
Wait until they're open, and give them a call. Give them your name, associated with the Ga Fiero club.
Post by: GTRS Fiero on January 14, 2019, 10:40:14 pm
I maintain several carts:
1. Items I need right away
2. Items I want while they're available
3. Items that I'll need, but am willing to wait for the higher discount
Post by: Raydar on January 14, 2019, 10:41:46 pm
It should show in your cart, after it's applied. Mine shows in the discount column of the cart. Be aware that the discount does not apply to all items.
Cool. Didn't realize that. It's been a while since I've ordered...
Post by: NoMad on January 14, 2019, 10:42:39 pm
Post by: Raydar on January 14, 2019, 10:44:50 pm
Raydar, your formula looks great. The only thing I don't care for is the nose. Never cared for the Formula nose.
That's quite alright. There are two others to choose from... :D
Post by: Fierofool on January 14, 2019, 10:45:20 pm
Post by: Fierofool on January 14, 2019, 10:55:30 pm
Post by: NoMad on January 14, 2019, 11:20:15 pm
Went ahead and hit send on the order with a note. If I get a few bucks back great, if not I am still happy.
So far I have some replacement switches on the way for ones that have become brittle.
The slotted and cross-drilled C4 Rotors for the brake conversion. Full poly-bushings all around and new poly end links for the rear swaybar, and their ultimate dogbone.
Should be a good start to getting everything handling right and ready for the fun.
Post by: GTRS Fiero on January 14, 2019, 11:23:46 pm
Post by: NoMad on January 14, 2019, 11:39:25 pm
Post by: GTRS Fiero on January 14, 2019, 11:40:57 pm
Post by: NoMad on January 15, 2019, 11:21:59 pm
I drove the car to work. Well I tried to. About 1/3 of the way to my second job I got a service engine soon light and then began to lose clutch pedal pressure. I opted to hang a right and head over to Northlake and see if Mike would mind me borrowing some tools to sort out the clutch and possibly get a read on the code.
So a quick check saw a leak coming from where the master cylinder meets the clutch line. Pulled it and found no obvious issues except that the angle looked off. A quick bend got the line-up better and screwed it back in. A quick pump of the clutch showed no leaking from fitting any longer. Pumped the clutch a bit and felt it leak down agan in 12 or so throws of the pedal.
That brought me to task two on the possible issues the clutch slave. A bit of finagling got the old unit out but not disconnected. The fitting into the bottom of the slave was good and stuck. I went ahead and mounted up the new slave and got it ready to go. Removing the flare nut required getting a littl old school and using two pairs of visegrips and some extra leverage. Bolt up went well and a gravity bleed and some clean-up made the clutch come back to life.
I really wish I had thought to take photos of the old slave..... the boot and pushrod came off and showed a mix of water and brake fluid trapped by the boot. It appears a small amount of brake fluid was passing the piston in the slave and wreaking havoc on the pushrod. May be Mike can still see it and snap a photo for you all to horror in.
As for the check light.... I assumed it was an O2 sensor from sitting so long. Durimg the clutch work the light appears to have cleared and as of yet has not returned.
Also done today was new wiper blades.
New stuff on the list, the dash light for the speedo is out. The odometer works but the trip meter doesn't. The parking brake light worked yesterday, but now doesn't. The fuel vent appears to have an issue as filling the tank causes a quick shut off of the pump and a large backsplash of fuel out the filler neck. Topped it up with premium just to get some octane back in her. In tapping the gauge, which was reading 7/8 full, to see if it might bump the needle..... the temp gauge needle flipped back into place and began to work again. So win some lose some.
But damn does this thing pull when you give it some gas!

Post by: NoMad on January 15, 2019, 11:26:09 pm
Post by: GTRS Fiero on January 15, 2019, 11:28:20 pm
You can check the dbrake switch or the bulb. The easy way to test the switch is to set the dbrake, and see if the chime comes on when you start the engine.
Post by: GTRS Fiero on January 15, 2019, 11:28:37 pm
Oh, and does anyone have the black plastic panel the sits below the windshield and has the wipers passing through it. Mine is paper thin and cracked badly.
Pisa carries the cowl.
Post by: GTRS Fiero on January 15, 2019, 11:48:46 pm
Post by: Fierofool on January 16, 2019, 08:56:02 am
When I installed the MC, I threaded the fluid line in by hand until it seated, then tightened it with a wrench. I thought I got it tight enough. I didn't find any fluid leak at the back of the old MC and I suspected the slave was the problem but didn't get to it. You might want to slide a length of the plastic wire harness cover over the fluid line between the slave and frame. This helps to insulate the line from the heat of the coolant line and exhaust downpipe.
If the CEL went off after turning off the ignition, it probably wouldn't be the Oh2. More likely the EGR system. I have 1 good EGR solenoid and Scott's parts car has one on it that's probably good.
I saw at least 1 cowl cover in the parts barn pictures. You would need to get TopNotch to check the barn. The one on ScottB's parts car might also be serviceable. The tree fell on the roof of the car at the right front corner, so the cowl may not be damaged. You would need to contact him about that.
There are also a bunch of instrument panels in the parts barn. Fuel and temp gauges are easy to swap. Trip odometer isn't a hard thing, either. The tach is easily interchanged, but you should be sure you get one that redlines at 6K. That would be the one for the V6. The only difference is that the ones we have are reflectively lighted, while the 88 was backlighted. Otherwise, they display the same.
Why did they give you so much problem with registering the car?
Post by: NoMad on January 16, 2019, 09:03:07 am
Post by: Fierofool on January 16, 2019, 09:09:25 am
I have some people in my neighborhood that have been running South Carolina plates on their cars for many years. Tax and insurance must be cheaper there. I guess they just register them at a relative's home. Thing is the lazy-a** city police just ignore it unless they catch you in a traffic stop.
Post by: Raydar on January 16, 2019, 06:54:27 pm
Do you know how to pull codes? Take off the plastic cover where the lighter sticks out of the center console/armrest. The ALDL is on the right.
Short the two pins on the bottom right (A and B) and then turn the key on. You will see the CEL flash once... twice... once... twice... once... twice. (That's "code 12", three times. Essentially checks the system.)
Then it will flash the codes that caused the check engine light. Any stored codes will flash three times. Code 32 is the EGR system. Usually happens at highway speeds. Before you spend a lot of money to fix the EGR system, I know a guy who can disable the EGR function in the ECM. :D
If you don't have any luck, I might have a cowl cover, too. Think I got it from the parts barn, and then didn't use it.
They all seem to be "slightly compromised", by now.
Post by: GTRS Fiero on January 16, 2019, 06:58:08 pm
Post by: MikeMac on January 16, 2019, 09:30:19 pm
Post by: GTRS Fiero on January 16, 2019, 09:40:26 pm
Post by: NoMad on January 18, 2019, 12:43:01 am
On the plus side, my bracket kits and 12"corvette rotors arrived today. Now to get them off to the machine shop in the morning.
Post by: GTRS Fiero on January 18, 2019, 08:11:22 am
Post by: NoMad on January 18, 2019, 10:45:36 am
Now to grab some new bulbs for the gauges and see if it is the simple fix or a more in depth. Hope to get that sorted before work....
Post by: NoMad on January 18, 2019, 01:26:25 pm
Looks like the guage might more accurate than I thought. Had surging on 75 south and the car acting like it was low or out of fuel. Limmped it to a fuel station and went to fill it up. This was a second pump that if set on even the slowest fill rate caused spray back and shut off in less then an 1/8th of a gallon. Slowly tricking fuel in she took just shy of 10 gallons. Should be a 12 gallon tank so I am guessing that the vent has somehow gotten plugged and is causing both the filling and the low fuel causing surging issues. No trip meter but a quick but of mental math without exacts is showing about 16-17 mpg highway which seems low to me even for the snappier engine. Thoughts?
Also, before I order a new one, does anyone have a known good tach filter I can swap in for a second to confirm if that is the issue causing the pegged tach?
No more CEL issues and none that have stayed illuminated once the car was turned off and then restarted.
Looking forward to figuring out what the body will end up doing.
Also, any preferences on shocks/struts? With the new bushings on the way I feel like a full suspension reset is in order rather than partial. I will end up doing bushings first to see if that clears the sway/wobble just for the sake of knowing down the road. Then the shocks struts right after.
Post by: TopNotch on January 18, 2019, 01:40:22 pm
If you have an auito trans, and the TCC solenoid is bad, your mileage will suffer.
Refer to this article (http://www.fiero.nl/forum/Archives/Archive-000001/HTML/20050410-2-057249.html), and build your own tach filter.
Post by: Fierofool on January 18, 2019, 02:03:25 pm
Not sure what's going on with the filler. I put 5 gallons in it across the street from Northlake Automotive when we first got the new injectors installed, and I had no problem. You may be able to disconnect the vent hose from the tank and back blow it with compressed air to see if it's somehow become plugged. I think Mike still has an old tank that you can look at to get an idea of the inside construction. When we installed the last pump and the new sending unit, the gauge was reading somewhere close to the amount of gasoline we put into it.
I have a tach, speedometer, trip meter and tach filter. I also have a complete 88 instrument panel internal assembly with all gauges, but I don't know how good the circuit board is, or if all the gauges work. I have several 85 V6 instrument clusters that could be installed as a test unit just to see if your sensors and wiring are good. The 85 has an 85 mph speedometer but it would work for testing.
I am running Monroe SensaTrac on my 86, front and rear. Also on the front of my 87, and they do very well, even in agressive Run For The Hills style driving. If you're interested in installing a set of KYB's on the rear, I know where you can get a pair, cheap. http://www.gafiero.org/bbs/index.php?topic=3146.msg30313#msg30313
We noticed that the air filter is a K&N. Recent studies have shown that while the K&N may improve engine breathing, it is at the expense of filtration. By opening up the filter, larger particles of dust can pass through. I've seen a lot of recommendations for WIX or Purolator1 or Purolator Gold air and oil filters. I removed my K&N several years ago and have switched to Purolator.
Post by: GTRS Fiero on January 18, 2019, 05:58:41 pm
If your vent is having issues, your system could be creating a vacuum inside the tank, which would cause issues. When you removed the gas cap, was there a rush of air?
I suspect that your tri-link bushings are shot.
Post by: GTRS Fiero on January 18, 2019, 06:03:24 pm
You can never get the stated capacity of fuel into a Fiero tank. Ten gallons is a good fill.
If you have an auito trans, and the TCC solenoid is bad, your mileage will suffer.
Refer to this article (http://www.fiero.nl/forum/Archives/Archive-000001/HTML/20050410-2-057249.html), and build your own tach filter.
I can get about 11.8 gallons in my Fiero, according to the fuel pump. I regularly get more than 10 gallons. That's 350 miles, though. My gauge reads about half a tank at between 208 and 219 miles.
Post by: NoMad on January 20, 2019, 02:00:48 pm

All the poly bushings and new switches arrived from the Fiero Store. At summit I grabbed some KYB front shocks to swap in during the work and some paint for the calipers and for the engine louvers. Tomorrow will be some work on the front to try and get the bushings done. Also planning to run up to Jefferson for the KYB rear struts and some braided stainless brake lines.

Finding the transmission giving some grinding and a thud down shifting to second when moving at more than a crawl. Might be the synchros letting me know a rebuild might be in the future.
Post by: GTRS Fiero on January 20, 2019, 02:03:08 pm
Post by: Fierofool on January 20, 2019, 04:19:14 pm
So you're going to get the KYB's from Kay? I've seen the brake lines and the don't have brakets to fasten them to the strut.
Bigger Ace Hardware stores have P shaped clamps with a rubber insert that can work well on the hose.
Don't let her talk your ear off. Sweet lady, but she loves to talk.
Post by: NoMad on January 20, 2019, 06:16:27 pm
Post by: Raydar on January 20, 2019, 06:45:01 pm
The Fiero tanks all have approximately 2 gallon of unusable fuel. Eight gallons into an 88 tank would probably be put in on the side of the road.
I regularly put 9+ gallons in mine, with just under 1/4 tank indicated.
I reworked/recalibrated my sender, years ago, but I'm not sure that I trust the gauge. (Never could get it to exactly zero ohms, empty.)
Post by: GTRS Fiero on January 20, 2019, 06:49:09 pm
Post by: NoMad on January 21, 2019, 10:09:18 pm
Stuff mostly came apart okay but there was a bracket that holds the back side of the upper control arm bolts ao you can loosen and adjust the UCA when aligning the car that died on removal. One of the ball joints was a little notchy so I opted to order replacements while I had it all apart. Sadly no uppers appeared available but the two lower ball joints will be new on reassembly.
Everything got a ton of cleaning done to it and is undergoing some paint work before reinstalling.


Time wasn't on my side and so the car is spending the night at uncle Mike's home for wayward Fieros with all the other problem children. Hoping to get it all sorted by midday tomorrow so I don't have to miss too much work.

Tomorrow will be a super early start to drive to Jefferson for the rear struts from Kay before heading back to Northlake.
Oh, and burning out the old rubber bushings with a Propane torch takes a minute...... Incase you were thinking of doing it and planning for it to be quick.
Post by: GTRS Fiero on January 21, 2019, 10:14:49 pm
http://rodneydickman.com/catalog/product_info.php?products_id=136
Post by: Fierofool on January 21, 2019, 10:47:37 pm
I'm not familiar with the parts of the upper control arm, but if you need the upper control arm bolt and bushings, I have a new pair. I'm about 7 miles off the interstate on your way to and from Kay's, and I will also be about 10 miles from Northlake sometime midday tomorrow.
Post by: NoMad on January 22, 2019, 08:01:16 am
At some point I will actually get my computer out and add photos to this. Just not set to do so from my phone yet.
Post by: NoMad on January 22, 2019, 09:52:53 am
Made it out to Kay's place in Jefferson but was a bit surprised to find they were not the rear struts but a set of front shocks. Well nothing ventured, nothing gained. Back to Northlake empty handed to get the front end back together.
Might just wait for the Fiero Stores upcoming 10% off sale and order the rear struts then unless someone has a better suggestion.
Post by: Raydar on January 22, 2019, 10:50:19 am
If not, and your interested in sampling a full poly 88 suspension with fairly fresh Monroe Sensatracs, I'll let you drive my car. (My springs are modded/slightly stiffer, but it's not harsh. My wife doesn't even complain, and she thought that my ZQ8 Sonoma "rode like a ground slide".)
Post by: Fierofool on January 22, 2019, 01:34:06 pm
Like Raydar, I have a car with SensaTracs all the way around, but it's been lowered or something and rides like a Ricer. Not a good example of the ride quality of Monroe shocks and struts.
Let me know if you want these instrument cluster parts and tach filter. I'll try to get with you somewhere so you don't have to drive almost back to Kay's.
Post by: NoMad on January 22, 2019, 06:27:21 pm
FF- Ya, I would still very much be intereded in the gauge parta and Tach filter as my Tach and trip meters arw still into.
Will be back at North Lake on Thursday to try and finish the front end suspension stuff if that is an easy spot for you. If not we can work out a good place.
Post by: Fierofool on January 22, 2019, 06:42:52 pm
Post by: GTRS Fiero on January 22, 2019, 07:09:34 pm
Before the swap, when making a left turn from a decline to a flat surface, the back end seemed to hop around. No more.
Post by: NoMad on January 22, 2019, 07:39:25 pm
Quote
Before the swap, when making a left turn from a decline to a flat surface, the back end seemed to hop around. No more.
This one seems to do it when making slight banks at highway speed and finding a little bump. The stearing just gets wishy washy for a second. Hopefully this will correct all of that.
Post by: NoMad on January 25, 2019, 01:29:00 pm


The front now feels incredibly planted and the ride is much nicer. Now going over bumps only has clunking from the rear. I am excited for the struts to arrive so I can tear down the back and refurbish it as well. That will also include the work necessary to unfreeze the rear toe adjusters from their rusty slumber.
In trying to sort out the horn issue I went ahead and pulled the horn relay from under the dash. My plan was to examine it.... But seeing as it crumbled in my hands on removal I feel confident in saying I need a new one :o
Washed the car today as well. Got all the caked on grime off of her and discovered that the rear trunk seal has shrunk and no longer can seal both rear corners. Anyone have this experience with that happening? The seal looks good but is just a touch small left to right.
Still loving being back into a fiero. Giggles every drive.
Oh, and we blew out the tank vent line and some dirt came free, but still a huge whooshing noise when I open the tank and no ability to not trickle the fuel in or the shut off pops.
Post by: Fierofool on January 25, 2019, 02:03:52 pm
Post by: GTRS Fiero on January 25, 2019, 04:18:52 pm
There could still be blockage in the vent tube at the tank. Also, I'd worry about overflow going into the vapor canister.
I'm glad this is all coming together for you, but especially that you're realizing the enjoyment from your Fiero.
Post by: NoMad on January 25, 2019, 05:13:54 pm
Milage is starting to hold at right about 20mpg.
Ya, was shocked to have the whole outer case of the relay crumble into tiny bits in my hand when I went to remove it. Not expected is an understatement.
Now to just find someone with the body panals I want..... Too bad Fiero Fiberglass sold their molds off piece by piece so I have no idea who has what and if they will be selling them.
Post by: GTRS Fiero on January 25, 2019, 05:31:24 pm
If you do drop the tank, I'd appreciate a picture or two of all the connections.
Post by: Fierofool on January 25, 2019, 06:54:16 pm
On dropping the tank, before you do, look at the small lines that come off the sending unit. Due to the different bend in one of the metal lines on the new Fiero Store sending unit, one of the lines was a little short and had a slight kink in it. I believe it was only the line to the vapor canister and shouldn't have any effect on venting, but you never know.
Post by: GTRS Fiero on January 25, 2019, 07:12:23 pm
Post by: Raydar on January 25, 2019, 07:33:01 pm
...
Now to just find someone with the body panels I want.....
Do you remember Fiero Warehouse?
Sage glassworks still makes those panels. (He is who has always made the panels for Fiero Warehouse, ever since they bought out IRM.)
sgwfiberglass at gmail dot com.
Post by: Slyp on January 26, 2019, 10:36:39 am
Post by: GTRS Fiero on January 26, 2019, 10:38:48 am
Tried that address and it would not come up!!!!! Was it me?????
This address?
sgwfiberglass at gmail dot com.
This is an email address.
Post by: Slyp on January 26, 2019, 10:44:45 am
Post by: GTRS Fiero on January 26, 2019, 10:46:38 am
Post by: Raydar on January 26, 2019, 06:43:39 pm
Should you happen to get a web site, please share.
He doesn't have a web site. He doesn't really have the time to make parts, as a full time activity. (He also has some family obligations, that I won't get into just now, that tend to take up a good deal of his time.)
He prefers to be contacted by email, so that he can keep everything straight. He doesn't do forums or Facebook, much.
Post by: GTRS Fiero on January 27, 2019, 05:42:27 pm
Post by: NoMad on January 28, 2019, 11:15:02 am
Post by: Fierofool on January 28, 2019, 02:25:11 pm
I wasn't able to attend the stripping party, so I don't have the filler cap from the parts car. There may be one in the parts barn if you'll check with TopNotch.
Post by: NoMad on January 28, 2019, 04:47:18 pm
As for the filler and vent lines, it might be time for me to pull them all and check for issues that way.
Post by: Fierofool on January 28, 2019, 05:17:09 pm
The vent to the overflow or vapor recovery tank and the overpressure return lines are placed differently. I have the old unit and also one that came from DeShoe's car if you want them for comparison. You can determine which is which without pulling the tank, just by injecting air into them. The one that's the overpressure line coming from the pressure regulator goes into the bottom of the tank, so you will get a gurgling sound when air is injected into it. The vapor line is terminated just below the sending unit flange, so it's not submerged and should have no sound other than air entering the tank.
Post by: NoMad on January 29, 2019, 10:49:53 pm
My big box from the fiero store also got here today so I have all my rear suspension parts on hand now and hope to get that sorted and installed on Monday. There is also a new headlight switch (The only one I hadn't replaced save the power mirror switch that is in fine shape), my factor service manual, and some minor interior parts. All that didn't arrive wawere my new floor mats that are being shipped direct from the manufacturer.
Also getting somewhere on locating some of the body pieces I want for the car so it is all coming together quickly.
Post by: Fierofool on January 29, 2019, 11:08:26 pm
Post by: GTRS Fiero on January 29, 2019, 11:15:57 pm
Post by: NoMad on January 30, 2019, 10:49:16 pm
Post by: GTRS Fiero on January 30, 2019, 11:43:11 pm
I take it you downshift as you slow down, rather than go the lazy route of holding the clutch, then picking a gear when it comes time to accelerate.
Post by: Raydar on January 31, 2019, 05:22:05 am
Clutch is doing fine. Still some 1st and 2nd issues on down shifts and shifting into 1st from a stop. I am guessing that the synchros on the one two shaft are worn. Likely won't be doing anything about it till it makes me though. Will do the tranny when I have to.
I don't know what kind of fluid is in the trans. If you haven't already, I would be tempted to refill it with Synchromesh, before you do anything major.
Post by: Fierofool on January 31, 2019, 09:05:04 am
I usually go to second then first maybe 10-20 feet before coming to a stop, wait until I'm at a dead stop and pull it back to neutral. I keep my foot on the brake, not allowing the car to roll, then most times, when it's time to move, it slides right into first. If it doesn't, I pull it to second then into first. I never sit at a light with the clutch depressed, saving wear on the throwout bearing.
Post by: GTRS Fiero on January 31, 2019, 05:54:10 pm
Post by: NoMad on February 01, 2019, 01:19:19 am
Post by: GTRS Fiero on February 01, 2019, 07:32:28 am
Post by: Fierofool on February 01, 2019, 09:14:38 pm
When the light changes, I go. I don't side-step the clitch, but, I release it and hit the gas. The next person is still putting theirs in gear.
When I clicked POST, it said I'd already posted, so I got out of it.
What I said was: Melanie did that in my Dodge and a lady running the red light took off part of the front end of my truck.
Post by: GTRS Fiero on February 01, 2019, 09:56:50 pm
You're supposed to be sure the intersection is clear, first.
Post by: NoMad on February 02, 2019, 09:36:15 am
All the rear suspension should start getting installed tomorrow and finished Monday with a fresh alignment to finish off the process.
I have had some luck in searching out the body parts I am looking for but not so much so that they have been ordered as it were.
Now researching my interior and electrical projects so I can have a solid plan of attack. Will include LEDs where possible to reduce current draw, adding a body control module for some more modern features, and improving the lighting. Last touch will be seats. Trying to decide between full replacement or MrMikes covers ...
Post by: GTRS Fiero on February 02, 2019, 09:45:14 am
For the LEDs, the under dash courtesy lights in particular, but the overhead also are a pain. I have not been happy with the color of the light. Less blue, or less green.
If you go with Mr.Mike's, leatherette is the way to go. Fiero seats are usually very comfortable. If you follow Mr.Mike's instructions, the seats should be more comfortable.
Post by: NoMad on February 03, 2019, 06:29:08 pm
Post by: GTRS Fiero on February 03, 2019, 06:40:08 pm
Post by: Fierofool on February 03, 2019, 09:56:08 pm
If the pump is pulling such a vacuum that the tank pops when the vacuum is released, it may be stressing the tank.
Post by: GTRS Fiero on February 03, 2019, 10:05:19 pm
Post by: Fierofool on February 06, 2019, 08:19:59 am
Post by: NoMad on February 06, 2019, 10:55:16 pm
Tomorrow morning before work should see the brakes finished and bleed and the car ready for its alignment at Mike's.


Post by: GTRS Fiero on February 06, 2019, 11:06:44 pm
Post by: Fierofool on February 06, 2019, 11:20:02 pm
Post by: GTRS Fiero on February 06, 2019, 11:29:45 pm
Post by: Fierofool on February 06, 2019, 11:59:36 pm
While searching my storage shed today, I found a number of OEM gas caps if anyone should ever need a replacement.
Post by: NoMad on February 07, 2019, 10:07:39 pm
The car feels amazing and the steering effort at slow speed is hugely reduced. The new wheels, tires, and brakes all look great on the car. Will need to track down a leak down in the brakes and rebleed the system in the morning but so far so good.

The alignment went well enough but I still seem to have some minor tracking issues and a bit too much play in the steering for my like. Will get a much closer look at the the tierods and see if any need replaced or if it might be a worn rack and pinion.
I can now hear that the only clicking is now from the doors and not the rear suspension. Guess it is time to order new door pins and bushings.
Also had the drivers side inner dew wipe come flying off into my lap shutting the door.... Guess it is time to order new ones....
Lots more little stuff and some electrical to sort but she sure is getting there.
Post by: Fierofool on February 07, 2019, 10:53:55 pm
Post by: NoMad on February 08, 2019, 08:18:23 am
Post by: Fierofool on February 08, 2019, 10:28:49 am
I have a tach filter that I'll bring to the meeting tomorrow. Anything else you need?
Post by: NoMad on February 08, 2019, 02:54:47 pm
Thank you! Wish I wasn't stuck at work.
Post by: Fierofool on February 08, 2019, 05:16:34 pm
Post by: NoMad on February 09, 2019, 08:10:53 pm
Now that the suspension and brakes are fairly settled it is clear there is still something wrong in either the steering or a bend in some suspension member as I still have some "hunting" in the steering and a pull despite a good alignment.
Will probably order front upper ball joints and inner and outer front tie rods. Figure everything else is new at this point, might be worth just finishing the job.... And if that isn't it only the rack and pinion or a bent suspension member are left.
Also kicked the heat on tonight and got the sweet whiff of a failing heater core or a leak..... Guess that just moved up the to do list with the AC system retrofit before summer.
On the plus side the tank vacume issue is now fixed, though I still can't fill at speed so ai will have to figure that issue out in time.
Still loving the old girl and enjoying the transformation totally.
Post by: Fierofool on February 09, 2019, 08:28:11 pm
Pull the cover off the heater core, underneath the right side dash and see if there's coolant in there. Have you cleaned out the heater blower and ballast resistor area, yet?
BTW, I left a tach filter with Mike, also. If it doesn't do the job for you, just return it and I'll put it back in stock.
Post by: GTRS Fiero on February 09, 2019, 08:29:49 pm
When the alignment is done, they are supposed to check the ball joints and tie rods. The alignment cannot be done properly if both aren't tight. If the Fiero wanters while driving, that is the tires or the alignment; if it's play in the wheel, that's the rack or something in the steering shaft.
Post by: GTRS Fiero on February 09, 2019, 08:32:39 pm
Post by: Fierofool on February 09, 2019, 08:35:45 pm
Post by: GTRS Fiero on February 09, 2019, 08:40:47 pm
We had the pulling issue with my wife's truck when the Cooper tires were rotated. Just in certain places. We couldn't find anything wrong with the alignment. Rotated the tires back, all good. Ended up replacing the tires with a different brand.
Post by: Fierofool on February 09, 2019, 11:30:32 pm
Post by: GTRS Fiero on February 09, 2019, 11:36:03 pm
Post by: NoMad on February 10, 2019, 12:15:22 pm
I am planning to pull the filler neck and see if I can find any obvious kink or obstruction that might be causing the filling issue.
Ya, planning to look at the heater core and check for the usual leaks or inlet/outlet cracks that are common in GM of the era. That is hopefully going to happen this afternoon if I can find a few free moments.
The alignment should find stuff, but only if it is obvious. Minor tweaks or slight looseness doesn't always show up on the rack. Having helped with the alignment there were not any glowing errors that indicate a specific component, but this wouldn't be the first time that a vehicle looked fine on the rack and I found tierods shifting at highway speeds.
I mostly end up in the left most lanes and the wander is still present there. Will be trying a few more things before dumping lots of money into new steering or suspension parts. Just looking for that rock solid planted feel I am getting from the suspension to also be present in the steering.
Thank you again Charlie, your help is greatly appreciated.
Also, is anyone rear trunk seal better than the others? This one is letting water by when it rains on one side or the other. Looks to be about a 1/4" to 3/8" too narrow left to right to actually seal the trunk.
Post by: GTRS Fiero on February 10, 2019, 12:18:49 pm
Post by: Fierofool on February 10, 2019, 02:23:54 pm
If you slightly lift the seal surfaces on each end, you can clean out any debris with a trigger air nozzle with a long tip and I'm sure there's debris in that drain area. That's the original seal and is in surprisingly good condition.
Should you decide that it best to just replace the rack, Check with CV Source in Buford, Ga. I know he had about a half dozen of the early racks in stock, and I think he also rebuilds the 88 racks. I made him aware of Rodney's bushings for the racks. Something he didn't know about.
Post by: NoMad on February 10, 2019, 05:59:58 pm
Got a better look and found the heater core is leaking. I pulled it and the corrosion was terrible. One of the in/out ends snapped off in the hose when I went to remove it. Thought I might braze it if I could find the leak but it appears the inside was plugged up pretty solid and the outflow of contaminants tells me to just replace it. So I am on my way to the parts store with Catherine now to pick up a new one. Worth the extra $20 over on-line prices to have the car for work tomorrow.
All part of the adventure I guess.
Also installed lots of LEDs to replace bulbs in the interior and it made a big difference.
Post by: GTRS Fiero on February 10, 2019, 06:03:14 pm
Post by: NoMad on February 10, 2019, 07:18:04 pm
Post by: GTRS Fiero on February 10, 2019, 07:22:41 pm
Post by: NoMad on February 10, 2019, 07:32:28 pm
Post by: Fierofool on February 10, 2019, 09:46:51 pm
I have a couple of original extra Harrisons that have been rebuilt and I'm running a rebuilt Harrison in my 86. The 87 has one of those misfit ReadyAire or Specter (sp?) short cores. There is a superb rebuilder up in Conyers, close to the Ga. 20 and I-20 intersection. They've been in business since I was a kid. The original shop in Tucker is where my Dad took our farm equipment and personal vehicle radiators and heater cores to be repaired. Fiero heater cores are about $45 for a repair. And you have copper instead of aluminum. And it fits properly. I have a rebuildable unit if you want to go that route. I may be able to get it rebuilt here in Lawrenceville and their truck deliver it to Conyers.
Sims Radiator
1178 Royal Dr SW, Conyers, GA 30094
Post by: NoMad on February 11, 2019, 02:58:13 pm
I will probably use your rebuilders and pull this one back out as soon as possible. It makes moving the heat slider a real pain which makes me think there is some interference inside.
While ai was in there I went ahead and pulled the donut spare and the Jack from the front along with the tools and retainers. With the new brakes I couldn't use it anyway so no sense in just carrying dead weight.
Also replaced the small incadecent bulbs in my marker lights for the last of my LED 194s I bought. Huge difference doesn't describe it.
Post by: Fierofool on February 11, 2019, 04:28:24 pm
Nothing you did should have affected the climate control slider. Did you clean out any debris while you were in the front compartment?
You may want to keep the jack in there. If you have a flat, it will allow you to remove the wheel and have it repaired. The jack is pretty specific to the Fiero. A shop or tow service would only have a floor jack and couldn't get it underneath the car far enough to lift in the proper locations.
Post by: GTRS Fiero on February 11, 2019, 05:42:04 pm
I use a putty knife to lift the speaker grille.
Post by: NoMad on February 11, 2019, 11:40:02 pm
Ya, the slider is now stiff and hard to move. That wasn't the case before.
As for the jack, I am pretty handy with a plug kit and anything worse I have towing and roadside so I might as well use it for once. 8)
Post by: Fierofool on February 11, 2019, 11:56:15 pm
Post by: NoMad on February 12, 2019, 03:45:25 pm
Post by: scottb on February 12, 2019, 06:01:21 pm
Post by: GTRS Fiero on February 12, 2019, 09:23:23 pm
As per my usual I cleaned the heck out of it all while it was open. Lots of dirty junk on the plastic but gladly no debris to be found. Guess I did an okay job on the earlier clean up.
Ya, the slider is now stiff and hard to move. That wasn't the case before.
As for the jack, I am pretty handy with a plug kit and anything worse I have towing and roadside so I might as well use it for once. 8)
Look under the right speaker. There is a clamp there for adjusting the door. You may have an issue there.
Post by: NoMad on February 12, 2019, 11:23:41 pm
Your mileage my vary, but I would put the spare tire back in. Taking weight off of the the front makes my car drive squirrely. I could tell a difference in the way it drives after throwing in 2 spare gallon jugs of water.
Soon the battery will be there to add some weight up front.
Post by: NoMad on February 12, 2019, 11:26:08 pm
Digging through my FSM I see that a lot of my dummy lights are inop and while they likely are not that big a deal I now want to go through and fix them..... More for the list.
Post by: NoMad on February 17, 2019, 03:49:35 pm
Charley had handed off a pile of gauge cluster parts a few weeks ago and I went through what was there in hopes of making a working cluster.
While I was in I went ahead and cleaned up all the contacts, all had heavy corrosion, and did the temperature gauge fix by flipping the two wires as shown on the tech tips page. Also installed a grounded electronic flasher so I could get my LED turn signals installed. While the gauges were out I went ahead and selected the best of the two plastic face plates and then used a headlight clean and seal kit we had laying around to make it look the best I could without a replacement or a full sand and refinish job.
The plug for the temp gauge and sender was totally disgusting and I had to use picks and QD Electronic cleaner to even be able to pull the wires and swap them.
Got it all back together to find some hit and miss results.
Funtional tach ✅
Funtional Trip meter ✅
Functional Temp gauge without pegging ✅
Funtional Speedo ❎
Functional Odometer ❎
Functional Overheat dummy light ❎
But I did get to see the big difference the LED turn and tail lights made.
When I get back from practice I will try to make a functional speedo/odo/trip combo from the units.
A few more off the list.
Post by: GTRS Fiero on February 17, 2019, 04:06:09 pm
Post by: Fierofool on February 17, 2019, 08:48:52 pm
Post by: NoMad on February 19, 2019, 01:02:10 am
It would appear something is failing in the boards rather than the stepper motors. Might be worth finding the input values for testing the functions off the car for accuracy of Speedo so I can replace the failed board components and build working units again and calibrate them. Project for another day I suppose.
I also asked for coverage for the 9th so I can make the meeting and hopefully bring Cat along as well.


Post by: NoMad on February 21, 2019, 03:16:02 pm
Instead I got woken up this morning by a call from Mr.Sims himself where he essentially told me that I could take what he brought in or me could build me a custom for $200+. So with the options of an $85 one that is no closer in size than the generic auto parts store unit or pay $200. So I opted to tell him to ship back my original core and I would look elsewhere.
Has anyone else had such a rude experiance with them? I know Charlie jas had good luck but this seems a little ridiculous.
Any other radiator shops in the area thay might be better? Any lines on NOS?
At this point I might just live with the ill fitting one till it dies.
Post by: Fierofool on February 21, 2019, 05:36:44 pm
Their home office is located in Tucker, just off Stone Mountain Freeway and Mountain Industrial. It might be easy for you to get over there, as opposed to Conyers. I'm certain you'd get better service.
I would offer to take the one I have to Lawrenceville, but I'm having back trouble again and can't drive. I might be able to get someone to take it to Lawrenceville if you'd want to pick it up there or at the meeting. You have my number. Call me if you want.
Post by: TopNotch on February 21, 2019, 05:44:56 pm
Post by: GTRS Fiero on February 21, 2019, 05:50:45 pm
Post by: Fierofool on February 21, 2019, 06:16:02 pm
Post by: NoMad on February 23, 2019, 12:19:17 am
Today was fairly productive as well for the fiero. Pulled the stereo to install a new one with blue tooth and hands free. While in there I went ahead and pulled all the surrounds. The oil pressure/voltimeter housing was barely held together and one a few of the screws even held anything any longer.
Using a two part plastic epoxy I glued as many of the broken pieces back together as I could and built up epoxy to replace the missing sections of plastic. Once it is fully cured in the morning I will drill new screw holes and hopefully have it a bit more secure. I also used the same epoxy and almost 25 clamps to reattach the skin to the housing and also the shifter surround. I will pick up more epoxy tomorrow and finish repairing the component vynal as best I can.


https://scontent-atl3-1.xx.fbcdn.net/v/t1.0-9/58549577_10218944288384165_5867134358099329024_n.jpg?_nc_cat=108&_nc_ht=scontent-atl3-1.xx&oh=99b915ea6f4fb7eed4aa5916aefdd057&oe=5D753DF7[/img]


I ran and installed the microphone for the blue tooth where the rear window defrost would normally be located. Not as clean an install as I would have liked but I no longer have a drill press that would have made a more precise hole possible.


Hope to start prepping some of the body work soon so I can get the exterior moving along too.
Also have everything but the bracket in hand now to do the Dodgerunner alternator belt and adjuster mod.
Post by: GTRS Fiero on February 23, 2019, 03:30:35 am
Post by: Fierofool on February 23, 2019, 10:26:27 am
Post by: NoMad on February 23, 2019, 07:26:18 pm
I did however find that parts of this console were originally Beechwood that was subsequently painted black. I do like the two tone of the black over grey though and will likely keep it.
Stereo went in without issues but somehow in the process I have created a fault in the dome light/trunk release relay circuit that is blowing the fuse instantly. Did some trouble shooting till I ran out of light and determined it was not the trunk release switch or the relay I just replaced. So now I worry I have pinched a ground somewhere. More searching in the morning.
Post by: GTRS Fiero on February 23, 2019, 08:34:53 pm
Post by: NoMad on February 24, 2019, 09:00:01 pm

Post by: GTRS Fiero on February 24, 2019, 09:05:08 pm
Post by: NoMad on February 25, 2019, 08:28:24 am
Post by: Raydar on February 25, 2019, 05:24:52 pm
If you unplug the trunk light from the connector, there won't be anything exposed to cause a short circuit, unless there is a pinched wire somewhere. (The trunk light is rather fragile. If one of the mounting tabs gets broken off, it can flop around in the opening, and short out. Everything behind it is exposed.)
Post by: NoMad on February 25, 2019, 06:40:39 pm
Today was a change of gears. Spent most of the day doing some body and trim work. Pulled the damaged and brittle vent trim plate from below the windshield. Mike had grabbed me one at the stripper party that only needed me to repair two cracks near the mounting points. A quick bit of plastic bonding epoxy made that a simple fix. It got a first coat of flexible bumper and trim black went on and a second coat will go on before mounting.

Cat also was really interested in learning the body work side of things so she helped me while I used fiberglass-reinforced body filler to repair some cracks and chips in the headlight doors. I had intentions to shave some of the logos so I went ahead and filled the Pontiac on the left headlight door at the same time.


With it being so nice out we were working in the sun and my working time was super short before it hardened up. Meant I ended up with a much thicker coat on than I had wanted so lots of sanding was to follow. Cat got in on the action and seemed to really enjoy it. Right before we had to leave for practice I finished getting the fourth coat of high-build sandable primer down on the doors.

So long as the kids from next door don't go putting hand prints in the doors, I will give them a quick sand with some 400 grit and a final coat. I grabbed a small can of color match paint that should be pretty close to what I want the final color to be. Will be a bit of a test.
Post by: GTRS Fiero on February 25, 2019, 06:46:00 pm
Post by: NoMad on February 25, 2019, 07:17:30 pm
Post by: GTRS Fiero on February 25, 2019, 08:06:53 pm
Post by: NoMad on February 25, 2019, 11:47:31 pm
Post by: GTRS Fiero on February 25, 2019, 11:50:12 pm
Post by: NoMad on February 26, 2019, 09:08:57 am
Post by: NoMad on February 28, 2019, 04:04:30 pm
Post by: GTRS Fiero on February 28, 2019, 05:50:30 pm
Post by: Fierofool on February 28, 2019, 07:25:53 pm
Post by: NoMad on February 28, 2019, 08:32:28 pm
Post by: NoMad on March 03, 2019, 06:42:21 pm
So this week should see my Dodge Runner bracket, and my Momo steering goodies arriving. Starting to all come together quickly.
Post by: NoMad on March 11, 2019, 05:58:41 pm


Post by: Fierofool on March 11, 2019, 07:23:33 pm
Post by: NoMad on March 13, 2019, 12:18:31 am
Post by: Fierofool on March 13, 2019, 09:14:53 am
Post by: NoMad on March 13, 2019, 11:37:50 pm
Post by: Fierofool on March 14, 2019, 12:25:20 pm


Post by: GTRS Fiero on March 14, 2019, 06:38:06 pm
Post by: GTRS Fiero on March 17, 2019, 12:59:34 pm
Post by: Fierofool on March 17, 2019, 01:38:54 pm
Post by: Raydar on March 17, 2019, 03:36:33 pm
And that's not to mention all the mechanical repairs/upgrades that you've done.
And yeah... The taillights. The new lenses look to be really nice, and are even endorsed by GM as a "replacement part". Keith is doing it up, right. I've already got my pre-order in.
Post by: NoMad on March 18, 2019, 06:17:09 pm
As for the tail lenses, I am still up in the air on my planned route there.....
Post by: NoMad on March 29, 2019, 11:53:44 pm
Biggest thing was that in adding power I just managed to find new week spots. No, not horse power. Stereo power.... The new head unit install quickly turned into all sorts of fun. The amp ended up needing a relay added to the wiring to make it function. Also the new head unit is not a particularly strong one, but apparently the old speakers had been on their last legs. In a few days time I lost three of the four and the last was doing a bit of a death rattle. So a combination of 50% or so off new 4x6 three wayspeakers for the back from best buy and a little Amazon-fu.... I now have new pioneer speakers throughout. I also went ahead and installed foam speaker baffles in place of thw carpet stuffed in the dash and the jute paddinf in the B pillars. Took a bit of doing but the sound is a million times better. My audio books sound great now too.
Also fixed the leaking rear spoiler with new gaskets from TFS.
Almost done with the reverse camera set-up as well. Mirror and camera is in but I still have some wiring to finish.
Also trying to decide if I should keep at doing the paint myself or look into having Tha Driver or a different pro handle it. Lots to decide still but getting much closer.
Post by: GTRS Fiero on March 30, 2019, 07:39:56 am
Where did you place the backup cam?
Post by: Fierofool on March 30, 2019, 08:36:03 am
Carpet in the dash?
Where did you place the backup cam?
I put foam speaker baffles into my 87. Makes a big difference on the front. Carpet was an owner-installed thing. Fieros never had anything behind the speakers.
I hope you didn't follow Ford's lead on installing the backup camera. On my Ford truck, the factory unit is installed behind the license plate. A 1.5 inch hole had to be drilled into the center of my license plate when I bought the truck.
Post by: NoMad on April 02, 2019, 09:36:26 am
The camera I have is mounted to a bracket that is held on by the license plate bolts. No holes drilled as everything, so far, has had a space to pass the wires without drilling.
Post by: NoMad on April 09, 2019, 09:54:12 pm
Mike's comment regarding Rotella dropping the spark rating made me bypass that as an option. Went with Mobil1 and opted for the Wix XP filter. The one that came off was much bigger (like 2x the volume) and at the next change I will try to find that volume filter. Oil looked okay but dark.
While I was down there I finally dropped the transmission oil. That was where the real surprises started. The initial oil coming out was milky and thin like a lot of water had gotten in. When I pulled the dipstick plug it was loose. It has spaces that look like several O-rings are supposed to be there but aren't. Cleaned it all up but still loose in the bore. Are their supposed to be o-rings? If not, anyone have a spare dipstick for the getrag?
Also pulled the airfilter for a look. The filter was dry as a bone, quite the problem for it being a K&N and needing to be oiled. I pulled it to clean and the thing was filthy! Makes me dread what got through it. I went ahead and took Cat's car and bought a NAPA gold air filter.
Simple stuff but like always, the car just seems to run so much better after. Also the getrag is shifting much smoother and seems to have less resistance and no more racking down shifting to second on the move. Still lots more to do but was nice to feel her respond to a little TLC.
Post by: GTRS Fiero on April 09, 2019, 10:09:07 pm
Post by: Fierofool on April 09, 2019, 10:59:47 pm
Post by: GTRS Fiero on April 09, 2019, 11:12:00 pm
Post by: NoMad on April 10, 2019, 12:08:21 am
Post by: NoMad on April 11, 2019, 01:48:49 pm
Post by: GTRS Fiero on April 11, 2019, 05:52:31 pm
Post by: Fierofool on April 12, 2019, 08:52:59 am
Going back now and adding photos. Tried PIP but the width restriction meant I would have to resize all my photos just for here. So instead they are links and I might have to updated them from time to time.
In order to keep my original, I copy the image then resize it to 1024 pixels wide. By doing that I can post an image with PIP and also have an image that I can send to someone so they can enlarge to see detail.
Post by: NoMad on April 27, 2019, 01:01:59 am
Now I just need to get my butt in gear and get the rest of the side panels and supports I need to do the GT aeros.
Post by: Fierofool on April 27, 2019, 08:39:18 am
Post by: NoMad on April 28, 2019, 12:29:12 pm
Also, anyone heard from Mike? Sent him a message on his phone but haven't heard anything from him.
Post by: GTRS Fiero on April 28, 2019, 12:32:56 pm
Post by: NoMad on April 30, 2019, 02:52:19 pm
Finished adding photos to the old posts so I am sort of up to date in that department.
with the change in engine and transmission oil and the replaced air filter my average on mileage went form 22-23 mpg up to 24-25 mpg. I am guessing it was mostly the transmission oil change as the milky watery stuff that came out couldn't have been doing much actual lubrication. The shifting feel is still very much improved after the change as well.
Lots to do still but progress is being made. Once back from Oregon the AC will be my number one target as it is getting WAY too hot for me already and I know it will only get worse....
Post by: NoMad on May 13, 2019, 10:28:15 pm
I ended up ordering a new shift and e-brake boot for the car. This triggered me to also order the shift boot bracket to replace the broken plastic one in the car now. Since I was already ordering from Rodney I went ahead and bought the shim for my getreg dipstick rather than spend the time reworking a penny.
Today I went ahead and installed the shim today and now the plug is tight and will keep water from making a second appearence in my tranny.
Also took the time to try and diagnose my low voltage at the gauge issue. At idle I am seeing 12.95v. I know it should be sitting closer to 13.6v so I will have to dig deeper into if it is a ground issue, the alternator, or the odd ball of the starter robbing it away. The real worry is that the car starts fine while cold, but seems increadibly slow cranking when it is hot from running. So now I need to get that sorted as well as the AC.
Post by: NoMad on June 01, 2019, 04:05:01 pm
All my A/C components to include a new H6A compressor and related components has been ordered or is here. Last bit I need for this is a new belt which I will source locally.
Got my rearview camera install finished with wiring finally buttoned up.
Ordered my other electronic flasher so I can make my hazards work again with my LEDs.
Also ordered an aftermarket power door lock kit and switch so I can bring the car into the 21st century in preperation for the BCM install I have planned.
Recieved and installed my shift and e-brake boots from RW Upolstry and am very pleased. He actually threw in a steal boot ring so I now have an extra due to my one I had ordered from Rodney.
A TFS dash recap is ordered and on the way as soon as they have it back in stock.
I have talked with ThaDriver and will be purchasing the body panels off of the warrior project car as well as one of his hood vents. Due to the paint from that car being so good but not the color I had planned I will be painting the remaining portions of my car to match before doing a vynal wrap of the whole car. Best of both worlds really. I will have to dig back through the build thread and figure out which shop painted the car originally. Also need to find the support brackets for the GT rocker panels.
I have also finally decided on interior color scheme as well. Going to stick with the dark grey and black that is currently there with some changes to what panel is what. Going to be adding carbon-fiber accents where appropriate. Not sure the TFS stick on are worth the $280 they are asking though. Next comes ordering the Mr.Mikes covers, deciding on how I am adding heating and cooling to the seats, and getting a bit of replacement trim for down by the drivers door where I broke the existing piece putting it back in after installing the e-brake boot.
I also plan to look into a tint film that will work to reflect and reduce heat gain without being dark. The car just gets way to hot.
Driving great though and doing over 100 miles a day on average the past few months.
Post by: GTRS Fiero on June 02, 2019, 09:59:08 am
A TFS dash recap is ordered and on the way as soon as they have it back in stock.
What is wrong with the dash?
Post by: NoMad on June 02, 2019, 03:16:11 pm
Post by: GTRS Fiero on June 02, 2019, 03:52:35 pm
Post by: Fierofool on June 02, 2019, 04:03:28 pm
I have always wondered if one could use a thin cloth-backed cowgrain vinyl and using contact or headliner adhesive, bond it to a good clean dash. It would need to be a thin material to conform to curves and for clearance for the speaker grills, defroster vent and other trim pieces.
Post by: NoMad on June 08, 2019, 09:39:50 am
So for this whole time I thought the car was without power locks. So I bought an aftermarket conversion and some stock switches and handle trim so I could make it all work and look right.
So last night I was getting out of the car and accidently elbowed the block off plate.... And heard door locks actuate! So it turns out that all the paint had just been rubbed off to a smooth enough degree that it looked like block offs. The locks don't actually actuate but they try so that means I just have to clean and lube stuff so they will work. Thankfully the after market kit was only $22. And I will still add the central lock mechanism so I habe keyless entry and trunk release. So not a total waste.
So ya, that was dumb of me....
Post by: Fierofool on June 08, 2019, 10:43:16 am
Most of our Fiero power door locks require a half dozen or so pushes to make it lock or unlock. Old grounds and lack of lubrication on the rods etc. lend to this.
Post by: TopNotch on June 08, 2019, 11:59:22 am
Post by: NoMad on June 08, 2019, 01:08:10 pm
Post by: GTRS Fiero on June 08, 2019, 03:05:15 pm
Post by: GTRS Fiero on June 09, 2019, 02:06:53 pm
Post by: NoMad on June 09, 2019, 02:10:17 pm
Post by: GTRS Fiero on June 09, 2019, 02:12:29 pm
Post by: NoMad on June 12, 2019, 12:20:51 am
Post by: Fierofool on June 12, 2019, 08:27:18 am
Here is a good thread by my Go-To AC guy. http://www.fiero.nl/forum/Forum2/HTML/117640.html
Post by: NoMad on June 12, 2019, 11:15:58 am
Post by: NoMad on June 14, 2019, 01:51:06 pm
This who AC fix has been one issue after another. This morning I thought I was finishing it up by charging.... But the system wouldn't take freon. Tried some trouble shooting and thought I had it figured as the low side schrader not being depressed.... So I tried to tighten the conversion fitting and it promptly snapped off the nipple from the dehumidifier. So new one and new valve ordered.
In my frustration I grabbed under thw hood..... And rubbed clear a conversion to r134 sticker dated for 98..... But there were no conversion valves on the system. So this has all likely been a lot of money spent for nothing.
I also can't seem to verify that the compressor is turning on or not. So more fun to taclle when parts get here Tuesday.
Pissed is starting to feel like my new middle name.
Post by: Fierofool on June 14, 2019, 02:59:48 pm
In past conversations with the original owner, he doesn't remember everything about the car due to having a bad accident. So, I probably couldn't get any AC information for you.
You can put a jumper wire in the cycle switch connector to get refrigerant started. I wouldn't do it for more than 10 seconds so as not to damage the compressor. I have usually just turned the can upside down to allow liquid to enter an empty system. It will expand enough to pressurize and make the compressor start. It could be that the person who did the conversion removed the adapter once they charged the system. My recent system replacement had a bad schrader valve in the accumulator and the service guy had to swap it with the one in my old accumulator.
Also, I would suggest that you don't use the variable orifice tube. A few PFF folks and I have encountered problems with their function. Mine had to be torn apart to get it out when the system wouldn't charge. The service guy installed a standard orifice tube and it worked.
Post by: GTRS Fiero on June 14, 2019, 04:39:15 pm
Post by: GTRS Fiero on June 14, 2019, 04:40:29 pm
Post by: Fierofool on June 14, 2019, 05:28:59 pm
What sort of problems with the variable orifice tube?
I think he said that the pressures were all wrong. I think it was building too much pressure on the low-pressure side.
Post by: Fierofool on June 14, 2019, 10:28:03 pm
Post by: NoMad on June 17, 2019, 04:41:28 pm
Wish I would have scrubbed under the hood and found the sticker so I could have tried just a vac and charge but such is life.
Lots more to do but I can at least now drive in comfort.
Post by: GTRS Fiero on June 17, 2019, 05:05:34 pm
Post by: NoMad on June 22, 2019, 02:37:34 pm
Also knocked iut my oil change last night. Been doing them at 5000 mile intervals. Oil has been Mobil1 synthetic and this time I grabbed a Napa Platinum pf52 equivalent for a little extra capacity.
What kind of change intervals have you all Been doing?
Post by: GTRS Fiero on June 22, 2019, 05:05:28 pm
Post by: Fierofool on June 23, 2019, 07:46:43 pm
Post by: NoMad on June 24, 2019, 08:36:48 am
Post by: NoMad on June 26, 2019, 11:35:19 am
My horn now mostly works. Cleaned the ground point on the horn to frame and away she goes. Still have some horn button grounding issues in the column to work out.
Tested the tempreture gauge since the new sender didn't fix the issue. Looks like the gauge is in op and needs replaced. Yay, back in the dash....
Post by: GTRS Fiero on June 26, 2019, 09:42:09 pm
Post by: NoMad on June 26, 2019, 10:01:08 pm
Post by: MikeMac on June 26, 2019, 10:02:44 pm
When you install the new pressure switches, let us know if your cooling fan runs all the time. If not, we'd all like to know how you wired them. DeShoe's conversion keeps the cooling fan running full time and no solution has been found other than to disconnect the switches.
Here is a good thread by my Go-To AC guy. http://www.fiero.nl/forum/Forum2/HTML/117640.html
NoMad...Is your cooling fan operating properly?
I have a feeling the problem on DeShoes's car is a bad low pressure cutoff switch in the back of the compressor. It is a normally open switch but it must be failed to ground.
Post by: MikeMac on June 26, 2019, 10:05:38 pm
No glazing. Just several cracks that were not there a week ago, some missing rubber, and where the belt snapped you can see the reinforcement bands.
That was a brand new belt right? Do you think you have a defective belt or is something on the car causing it to shred?
Post by: NoMad on June 27, 2019, 09:44:02 am
I will have to check on the cooling fan, been so many other small issues I forgot to check.
I am guessing it was a defective belt. I had thought it might have been belt tension issues possibly but am not so sure after getting the new one on and tight and not seeing any issues at all despite the same process and general level of tension.
Post by: GTRS Fiero on June 27, 2019, 05:34:32 pm
Post by: Fierofool on June 27, 2019, 06:05:09 pm
Post by: GTRS Fiero on June 27, 2019, 06:06:55 pm
Post by: NoMad on June 28, 2019, 06:35:52 am
I also lost my mind and did some painting last night. I thought I was try an above the waterline boat hull paint for its extreme durability. It was rated to be sprayed without thining in an airless sprayer so I gave it a shot. For 15 bucks it seemed a good plan. It was not good. The airless sprayer put it out as a film rather than a spray. So it went on WAY too thick. Painted one headlight door, two rear quarter ground effects trim panels, and the roof and A pillars of the car.
The green is nowhere close to the sample color shown and even further from the shade of green I was looking for. It is straight up John Deere green. At least it should be good and sandable by the time I get back in a week so I can at least smooth it and get it ready for a repaint.
Post by: GTRS Fiero on June 28, 2019, 07:54:39 am
You could paint the headlight doors, spoiler, and ground effects yellow, and the rest of the Fiero John Deer green.
Post by: NoMad on July 29, 2019, 11:49:11 pm
Big news is that my Aramida Fi512 bumper arrived. I got it right before leaving on a trip so no work yet. Hope to fix that tomorrow.
Worked on my e-brake today but it didn't do much to help. Adjusted the cables and followed the adjustment procedure but it still won't hold the car. I am guessing the adjustment screw isn't working.
Seeing others reporting 35 mpg with the 3.4 and still seeing just under 25 mpg so that is concerning.
Still thinking really hard about which direction I want to go with the motor. I know I want more than I have but hard to decide how to get there.
Post by: NoMad on August 01, 2019, 01:36:25 am
Post by: Fierofool on August 01, 2019, 08:43:44 am
You can adjust them at the caliper by removing the cables and spring, then loosen the lever from the back of the caliper. You may have to remove and reposition the lever. Put the nut on to prevent the screw from going into the caliper, and ratchet the pad down. It may take several times until the pads touch the disk. Then reinstall the lever as near the rest stop as possible. You may also have to loosen the cable adjuster after doing this.
Post by: GTRS Fiero on August 01, 2019, 06:49:03 pm
Post by: NoMad on August 02, 2019, 12:00:06 am
Post by: NoMad on August 06, 2019, 10:10:00 pm
Removed for error. Will be replaced.
The side panels that came in some time ago. I have since drilled the holes for the ground effects

Getting ready to do some fiberglass!

The hood vent as I bought it from ThaDriver

The hood before install. You can also see the test panels and some stages of body work in process.

The scoop after trimming.

The hood marked for cutting. I made the template out of cardboard just as the instructions on Paul's site say.

No turning back now!

Opening up the space for the heat/air to escape from behind the radiator.

The test fit.

Attaching the support strips to the hood. if you look close you will see I built up corner supports from fiberglass mat in the lower corners.

The scoop screwed down while the panel adhesive cures and I start laying down fiberglass resin with chopped up mat in it.

Here you can see where I have "v" ground the panels to accept the fiberglass.
I then forgot to take photos of the next several layups of material. I ended you working both the top of the hood and the bottom. While there is lots left to do I am comfortable that it isn't going anywhere between the panel adhesive on any touching surface and all the fiberglass work.

This was the first time I had worked with such a light filler so when I went to poor it on for in place mixing I put down way too much. So this was too thick of a coat for sure and most of it came right back off with the random orbit sander.

I had somewhere to be so I had to stop here. It isn't where I wanted it to be but more than enough to go back on and drive around for a bit till I can get another day to work on her.

Going back together so I can get on the road.

And pretty much as she sits now. I have noticed since the panels started going all different colors and the body mods started people seem to let me in a lot more readily. It is like they think I don't care about the car or something. They are wrong but anything to keep people away from me on the roads isn't all bad.
Got back home today from Vancouver to find that my Mr. Mikes covers are here! I will try to get them installed next week when I get back from Tennessee.
Post by: GTRS Fiero on August 06, 2019, 10:16:16 pm
Not many cars have "eyes" of different colors.
Post by: MikeMac on August 07, 2019, 02:12:05 pm
Post by: NoMad on August 14, 2019, 11:24:26 am
I was teaching in Northern Tennessee on Saturday which put me close to go and grab a pair of brand new 3.4 TDC motors. With the extra side trip it meant over 10 hours in the truck on Saturday though.... Ouch.
Motors are not as prestine as I would have liked but still new. Seems they came from a vocational/technical school auction so I will be giving them a real close look before either is installed but the reality is they should be fine.
I also started installing my Mr.Mikes covers yesterday and plan to finish that today. If time allows I will also go ahead and start preparing the templates for the new custom center console I plan to assemble.
Post by: NoMad on August 14, 2019, 07:22:00 pm
Some interesting things I learned in the process include that these were not the original seats in the car. They appear to have come from an 86. I am also missing the plastic
upholstry protector from the driver's side seat.
The comfort difference is really noticeable. I am really happy about not only the look but also the feel. I am excited to get this major step done finally.
Post by: GTRS Fiero on August 14, 2019, 07:52:59 pm
TFS may have that protector. Unpainted, of course.
Seat heaters? In GA? I thought those were more for Alaska?
Post by: Raydar on August 14, 2019, 09:11:54 pm
...
Seat heaters? In GA? I thought those were more for Alaska?
I've got heated seats in my G6. They really come in handy. Especially for leather seats.
You (or at least I) can generally get by without them, with cloth upholstery.
Post by: GTRS Fiero on August 14, 2019, 09:17:24 pm
Post by: NoMad on August 15, 2019, 11:43:20 am
As for the seat heaters, I have a major set of back problems and so following some practices or workouts I use them to alleviate some of the pain.
Post by: GTRS Fiero on August 15, 2019, 05:49:11 pm
Post by: NoMad on September 10, 2019, 10:59:56 pm
Also changed the AC belt while I was in there as it was dqueeling a touch occasionally when the car was warm and had been idling a bunch. Still working on sorting out the pressure gauge issues to get a real idea of the motor temp. Will burp the coolant when I take the car off stands tomorrow.
I also managed to score a full set of 2013 Camaro tail lights and trim bezels to make my own set up for the fiero so I will start the prep for that tomorrow if I get the time before the heat gets to be too much in the garage.
Just waiting now on the shipping quote for the spare 88 cradle I am purchasing and all the parts I ordered from Rodney to arrive so I can start building up the cradle I will be putting the 3.4 DOHC set-up on and preparring for that swap.
Also unboxed the body panels I will be putting on the car and started to layout my battery relocation to the frunk.
Lots of stuff to do yet and that doesn't include all the paint work I have ahead of me!
Hope that I can trouble shoot any remaining issues and be able to make RFTH.
Post by: GTRS Fiero on September 10, 2019, 11:02:07 pm
Post by: NoMad on September 11, 2019, 12:02:10 am
Post by: Fierofool on September 11, 2019, 09:55:34 am
Post by: Fierofool on September 11, 2019, 05:26:26 pm
Post by: GTRS Fiero on September 11, 2019, 06:09:52 pm
Post by: Fierofool on September 11, 2019, 07:35:17 pm
Post by: GTRS Fiero on September 11, 2019, 07:48:15 pm
Post by: Fierofool on September 11, 2019, 07:56:59 pm
Post by: GTRS Fiero on September 11, 2019, 07:58:55 pm
Post by: NoMad on September 12, 2019, 12:45:17 am
Where are you located out here?
I am right on the Stathom side just a little off 211.
Post by: NoMad on September 12, 2019, 01:00:31 am
Got most of the battery relocate done today and will try to finish in the morning. It isn't my prettiest work but will work for now. Looks like I will have to tru and source a spare frunk tub to do the pretty version of the conversion too for when ai get a chance to go back over details.
Ya, I will link up a photo of the brown residue that came from the filter. Was nasty to say the least. Glad it was in the filter though and not my motor!
Post by: Fierofool on September 12, 2019, 07:59:05 am
For the front tub, Scott may still have the one from the stripper car.
Post by: GTRS Fiero on September 12, 2019, 06:11:21 pm
In that case, have Marilyn drive her car, too. The more cars the more fun.
Agree.
Post by: MikeMac on September 12, 2019, 08:24:03 pm
Post by: GTRS Fiero on September 12, 2019, 08:52:54 pm
Post by: MikeMac on September 12, 2019, 10:14:48 pm
Post by: GTRS Fiero on September 12, 2019, 10:21:13 pm
Post by: MikeMac on September 12, 2019, 10:46:31 pm
Sorry, my post came out critically. I was just curious. That cleaning would seem to be adequate.
No worries...
Post by: NoMad on September 13, 2019, 01:00:48 am
Finished the battery relocation but am entirely unhappy with my battery solution and will be asking Scott about the frunk tub so I can have a mark two attempt. It works fin but is fully and not what I had planned.
Burped the coolant tonight as well and was a little low out front and got a few small burps out of the system so hopefully that helps. The coolant looked terrible though so I am feeling a full change and flush as well as a hot tanking for the radiator to get all the gunk out. Will likely save it for the same time as the engine swap though as long as that proceeds on a decent timeline.
Also saw some cracking on one front engine/transmission mount but couldn't get it to budge so it too will wait for the engine swap. Already have all the new poly mounts on the way from Rodney.
Getting closer. Tomorrow will see 120 miles to see if all is well. Then fix the seatbelts and she should be mechanically ready.
Post by: NoMad on September 13, 2019, 04:14:31 pm
So I am left with either the battery being bad, the power line to the starter being bad, or the starter being bad. Won't have a chance to test it till Monday probably and that doesn't leave me time to feel confident in the car before RFTH. Will probably have to pull myself for this year unless a miracle happens and I can get it fixed and solidly tested before then.
Post by: TopNotch on September 13, 2019, 04:29:47 pm
Post by: GTRS Fiero on September 13, 2019, 05:44:07 pm
Post by: Fierofool on September 13, 2019, 05:52:25 pm
Also, for your front battery box, people have used a marine battery box that is cut diagonally down the sides. I remember someone said they put it to a depth just above the steering rack and they took their spare tire and turned it over to hide the battery. https://www.westmarine.com/battery-boxes-hold-downs
If the Fiero isn't ready for RFTH, come in Marilyn's car, if not for the run, for the event and comradery.
Michael and Pat have good points. In my last 3 batteries, I have found that the side post screws don't catch fully into the battery terminals. Seems they are now making the threads start deeper into the terminal. I remedy that by using a terminal designed for connecting multiple batteries together.
https://shop.advanceautoparts.com/p/dorman-help-3-8in-16-x-15-16in-stud-length-1-5-8in-long-side-terminal-bolts-with-spacer-60310/17190401-P?navigationPath=L1*14920%7CL2*15001%7CL3*15610
Post by: scottb on September 13, 2019, 06:17:11 pm
Post by: NoMad on September 14, 2019, 07:39:54 am
As for thr cables, I am running 0/1 so they are way more than needed and check out at the terminals.
I actually used a marinw battery box for this but didn't do a satisfactory job and need to redo it.
I am 99% sure it is the starter at this point but will know today when I get it tested after work. Looks like it is time for a gear reduction unit.
RFTH: If I can't get it all sorted in time I will use the already secured time off for us both to go do something she wants to do as a consolation for her cancelling things to be able to come with me. Relationship gove and take.
Post by: GTRS Fiero on September 14, 2019, 07:44:50 am
It could have been worse.
Post by: NoMad on September 14, 2019, 07:48:46 am
The positive lead rested against the oil filter?
It could have been worse.
That exactly. All the 14+ hour days between work, the commute, and trying to get the car ready sure have caught up. But ya, could have been way worse. Now to get back on the road for another of those long days.
Post by: Raydar on September 14, 2019, 09:29:13 am
BTW... my ground cable runs to the bolt that holds the brake booster to the front bulkhead. I also have two grounds on the engine. One from a bellhousing bolt/stud to the left hinge box, and one from the rear head to the shock tower/dogbone bracket.
I did not "home run" the ground cable. My 2009 Challenger had the battery in the trunk. The ground was connected to the body of the car. Worked fine.
Post by: GTRS Fiero on September 14, 2019, 09:55:55 am
My belief is that ground issues develop over time.
Post by: NoMad on September 15, 2019, 12:16:33 am
Battery tested okay. Down more than it should be for its age but I think all the excess heat is likely the cause of that.
Got a 1.7kw gear reduction starter and it weighs nothing compared to the factory. It is the one for the L67 and has the lifetime warranty so it should be worth the money. Went ahead and bought the fancy heat reflective blanket for it as well to try and preserve it a bit more. Also planning to run the hit lead to it as another 0/1 since I have extra left over and the terminals.
ScottB hooked me up with the spare frunk tub and Charlie was kind enough to bring it out to the neighborhood for me so I could grab it tonight and not have to make an extra trip.
So Raydar, why the knife switch? For storage? Security? Ease of disconnect for working on it?
Post by: NoMad on September 17, 2019, 02:20:33 pm
The car does drive a little bit nicer with the battery out front and the new starter (1.7kw for a 3.8SC) really kicks it over nice.
Oil looked good and was right at the 3000 mile mark. Early for my regular changes but it had to happen.
I am certainly out for RFTH with the surging happening. Omce the outside temp comes back down again I will go ahead and start looking at the temp gauge so I can get some accuracy on when it starts missing and if it is temp related. The miss starts when under load/accelerating.
Post by: Fierofool on September 17, 2019, 04:57:58 pm
Post by: GTRS Fiero on September 17, 2019, 05:50:11 pm
Post by: GTRS Fiero on September 17, 2019, 07:15:57 pm
Post by: NoMad on September 17, 2019, 08:12:32 pm
Post by: Fierofool on September 17, 2019, 08:39:58 pm
Scott pulled out for a test drive and surprised himself when he broke traction as he started down the street.
Post by: GTRS Fiero on September 17, 2019, 08:46:31 pm
Post by: NoMad on September 18, 2019, 09:10:42 am
Post by: NoMad on September 18, 2019, 07:06:44 pm
Ran around to get the stuff I needed together and got into testing. I started at the coil, distributor, and ICM. Pick-up. Cpil and actual coil both checked good.
I took the ICM to advanced near me and asked them to test it. At first the kid said they can't. I insisted that they should be able to so he begrudgingly asked his manager. Yup, they can and he would teach them. They finally came back saying it failed all but one test. Great, problem solved! They didn't have one but a call to O'Reilly's confirmed they had two grades in stock. I drove over and figured I would have them test the ICM as well just to be sure. Their machine is down. Well I look over both units and opt to spend a little more and get the US made Standard Switch product.
Get home and install it all with only a little difficulty. Check and reset the timing. Seems okay. Test drive looks great till 45 minutes in when I turn around happy and go to get up to speed again. Surging is back under load and when mashing the pedal suddenly. Almost like an old round slide carb flooding the cylinder with too much fuel from too rapid a twist of the grip.
So back home and back into the garage. Guess tomorrow is back at it for the morning then the truck to work.
Post by: GTRS Fiero on September 18, 2019, 07:34:44 pm
Post by: NoMad on September 19, 2019, 11:51:29 am
So fuel pressure testing....
Initially goes to almost 60 psi! Then settles down to near 45 psi. Snapping the throttle open in neutral results in a spike to 57 psi then back to 45. Holds 45 till red line without issues when cold.
Left it running and repeated tests as the motor warmed. Once hot a pull toward redline would drop the pressure to 20 psi for a moment then rebound. As it continued to get hotter it wouldn't even reach redline as the pressure would drop to 20-30 and stay there. I started to see some smoke so I let off and shut it down and saw the muffler and the CAT were both red!
As I left for work (driving the truck) the fuel pressure gauge was reading 0 psi this time. It was holding before it was warm. Might mean an injector is sticking open causing the FP drop and a super rich cylinder which could ne causing the cat to work extra hard and thus the EGT being so high but only CAT and back as the manifolds were not getting red.
So I am asking:
Is the pressure is supposed to spike like that on acceleration?
Is the high starting pressure an indication of a bad FPR?
I am assuming my pump is failing and heat is exasperating the situation. Or the above mentioned injector issue.
Also assuming the red muffler and cat is a result of high EGT due to the lean condition when the fuel can't keep up, or tue rich cylinder causing excesive combustion in the CAT and this high EGT from the CAT back.
Thoughts?
Post by: Fierofool on September 19, 2019, 03:17:01 pm
If the problem was lean a/f, the exhaust manifolds would glow. Retarded timing can give the same result. Sounds like it's dumping fuel into the exhaust. I didn't realize it still had the catalytic converter on it. I thought it had been removed before we got it.
You might get a little spike at the start but the regulator should release the pressure to the tank return line. Both your high and low readings are far out of range for what I understand as normal.
Post by: GTRS Fiero on September 19, 2019, 08:05:01 pm
I would check the vacuum line on the FPR first. It almost sems as if the issue is there. The fuel pump and FPR do not know about the throttle, RPM, or temp. If there is a leak or blockage in that area, it could cause the problems you're experiencing.
Post by: NoMad on September 23, 2019, 10:18:13 pm
First, it turns out the car has an adjustable fuel pressure regulator and some quick adjustments had the pressure working right. I also ran the troubleshoot on the fuel line and the return was clear. I was able to perform a run up and some fast temp checks. The reduced pressure seems to have cleared up the hesitation and I am not seeing the cat and back afterburner that got the cat and muffler so hot. I wanted to test further but while I was running the motor up near red line to look for the hesitation and pressure drop I saw atomized liquid spray on the belt side. I feared I had failed to tighten the return line so I shut it down and looked. Fuel lines were fine so I fired it up and saw coolant coming from the Thermostat cap.
Went to try and get another but the stores near by had none in stock so I came home to a now cooled motor to take a look. Found that the Thermostat had gone from normally seated to the small arms being bent in on one side and the thermostat dislodged. Not sure how that happened but it appears to have been during the run ups.
Since thw coolant still looks so muddy I figured tomorrow starts a flush. I ordered the evaporust cooling system flush as well as new caps for the rad and thermostat as well as a slant superstat. Amazon will be delivering it all over the next two days so I should habe it all back to clean and usable so I can finish trouble shooting.
Best guess is that the increased fuel pressure is the culprit behind the poor economy, the hesitation, etc. Likely from a sticking injector.
Seems strange to do so much just to swap the motor but I want it running right till then and also to be good to go for the new owner of this engine.
Post by: GTRS Fiero on September 23, 2019, 10:27:56 pm
The thermostat usually gets bent if not seated correctly when the cap is installed. There should not be enough pressure to bend the thermostat.
Post by: mweldon on September 24, 2019, 11:16:11 am
Post by: Fierofool on September 24, 2019, 12:24:48 pm
Post by: GTRS Fiero on September 24, 2019, 06:01:03 pm
Post by: Fierofool on September 24, 2019, 08:46:17 pm
Post by: NoMad on September 25, 2019, 10:20:51 pm
So the front bank were rusted in place so much that I couldn't even get the plug socket down past the insulator. It was a screwdrivers as picks and PB blaster kind of chore. Took me the better part of an hour to get them cleaned out enough to get the socket "on" what was left of the plugs. There really wasn't enough of the material left to be called a nut. Had to side load the socket against the head to get them moving. Was not a pretty sight.
So the view only got worse after cleaning up the ports and checking compression. Comps were roughly as follows:
125 - 125 - 95! - 150 -150 - 160. So not good to say the least. Cylinder 4 looks dead in the water. Went to do an oil test to confirm rings or valves and had my compression tester schradder valve die. A trip to Advanced later... I was back and the motor was so cold now nothing was showing good comp. All cylinders were showing around 90 with 4 showing 32! Oil in and #4 reads 89/90. Rings it is. On a whim I decided to try the Engine Restorer after seeing good indepe dent testing results from unpaid third parties. So I drained off some of the oil I had just put in and added a can. Redid the timing an was ready to try her out.
Test drive was about 35 miles and it seemed to be running on all 6 cylinders again and smoothed out a nit by mile 6. Felt good with no surging. Mile 24 the surging started up. Got it back to home before the surging got too bad and will warm and compression check in the AM. The restorer is supposed to take some time and heay cycles to really worm it's magic but I plan to take an initial reading on a few cylinders just to see if there was any early effect.
Also did the testing on my temp gauge circuit. Was Not seeing signal from plug to dash so I was worried there were larger issues at hand. After mucj testing and cursing I pulled back the wire protector to find the the new plug end was added long ago by the twist them together and add e-tape method. Broke that down and checked again. Good signal all the way to the dash. So a couple heat shrink butt-splices later and the addition of a chunk of #2 double wall glue filled heatshrink to hold all of it super secure, and I was able to add a new terminal end from Rodney and check again. Good signal to dash. Passes dummy light and curent tests. Zerp movement in the gauge. So a new temp gauge will have to be sorted asap.
So tomorrow will see a compression balance quick check and I will likely drop the tank as the last culprit on the list for the surging is likely a failing fuel pump. Since thos motor or the LQ1 will both need good fuel flow I feel okay making that purchase even of the compression doesn't return with the snake oil.
If the motor is dead I will need to really kick the LQ1 train into gear and fast.
Post by: GTRS Fiero on September 25, 2019, 10:27:09 pm
I thought that Fiero was supposed to be rust-free. I can't recall ever seeing installed plugs in the condition you described.
Post by: Fierofool on September 25, 2019, 11:00:51 pm
We have installed 2 fuel pumps into the car. You may have a warranty receipt in any papers we gave you.
I wouldn't have expected it to have low compression by the way it ran. It seemed to idle well and had plenty of power. I believe I replaced the cap and rotor early on when I had it here at the house and was trying to get it running. I don't remember if I replaced the plug wires, though. We did pull plugs 1, 3, & 5 to check them when it started running badly. That's when we discovered the plugged injectors.
Post by: TopNotch on September 26, 2019, 10:23:07 am
Post by: NoMad on September 26, 2019, 11:16:34 am
So I am officially blown away! I only have about 30 miles since adding the engine restorer and after a 20 minute warm-up idle all the compression is within 8 psi of each other! It is still slow to build on. A few cylinders but since it should take till 200 miles to be worked in I am really impressed. All the numbers were different than yesterday but all uniform so I would put that down to heat being closer to equal as I didn't have the long cool down while I fought the front plugs.
Short test drive showed good driving and some stalling when letting the revs drop fast with the clutch in. Also pointing to the Fuel pump failing. Will grab a new pump and strainer from NAPA or one of the chains and drop the tank tonight after work and do the coolant flush at the same time.
Post by: Fierofool on September 26, 2019, 11:27:27 am
Post by: NoMad on September 26, 2019, 04:10:02 pm
I decided to go with an HPF quantum 255LPH pump with a lifetime warranty and grrat reviews from others. It is known to support cars in the 400-500 whp range and was less for the full install kit than the napa or carquest basic ones. This should cover the LQ1 even after the turbo. It is also said to be near silent. Should make for a much better total system.
While it is out I plan to rewire to a heavy gauge power and ground as well as a relay so the current should be sufficient to ensure a cooler running pump. Will also figure out this damn vent system so my car can fill normally instead of the trickle method I currently use.
Marilyn's question of "How much more of the car is there to replace at this point?" Is starting to ring rather true. 😭
Post by: Fierofool on September 26, 2019, 04:38:29 pm
Post by: Raydar on September 26, 2019, 04:44:48 pm
...
Marilyn's question of "How much more of the car is there to replace at this point?" Is starting to ring rather true. 😭
Holy moley!
I echo Charlie's sentiment. I thought it was ready to rock n roll. Jeez.
Post by: GTRS Fiero on September 26, 2019, 06:08:57 pm
Post by: MikeMac on September 27, 2019, 08:08:38 am
http://www.gmtuners.com/fiero/hot_wire.htm
Post by: NoMad on September 27, 2019, 01:24:51 pm
Mike, yes I am doing that mod to improve power. Been a bit of a mission on every circuit I touch.
Post by: MikeMac on September 27, 2019, 01:30:38 pm
Post by: GTRS Fiero on September 27, 2019, 06:47:42 pm
I know you (the Club) were unaware of the issues. I was so excited about the car I failed to do all my normal checks which puts the onus on me, not thw club. Totally fine with all stuff. I still would have bought the car, just probably have made a smaller offer to cover time and materials. No worries here.
Mike, yes I am doing that mod to improve power. Been a bit of a mission on every circuit I touch.
It is entirely possible that many things would have checked out OK, anyway, since it drove fine for about 8 months.
Post by: NoMad on September 28, 2019, 07:56:21 am
Post by: NoMad on September 28, 2019, 08:04:30 am
Also go the fuel pump changed out. I have all my materials for the pump rewire but held off as I wanted to get the car back together and test drove. I will do the rewire when I drop the cradle for the motor swap since I will be cleaning up the whole engine bay and all wiring at that time.
The inside of the tank was quite dirty but seemed mostly solid. I actually pulled grass clippings or straw from the sender assembly to Fuel pump stand base. Alsp cleaned loose dirt and gunk from the float and all over the sender. If I had more time I would have drained and cleaned it again but there is only so much I could get done last night.
Quick results look positive that the stumble is gone. Will be checking a plug this morning to see if it is running okay and doing a longer test drive to confirm my quick results.
More to follow but hopefully back to being my daily driver again.
Post by: GTRS Fiero on September 28, 2019, 08:29:04 am
Post by: TopNotch on September 28, 2019, 12:16:56 pm
Post by: GTRS Fiero on September 28, 2019, 12:41:41 pm
Post by: NoMad on September 28, 2019, 12:53:37 pm
I am planning to strain the coolant drained during the first flush and will do the same for the coolant I drain this time with the evaporust. Should be interesting to see what all comes out. Plan to use an automotive paint strainer so it should pull some very fine particulates.
Post by: GTRS Fiero on September 28, 2019, 01:07:24 pm
I already had the Champion radiator, but the stock one looked great. With testing, we did eventually find a pinhole leak. Not enough for coolant to get through, but a bit of air at 40 PSI.
So, we swapped. My old radiator was sealed, and is now in another Fiero.
Post by: Fierofool on September 28, 2019, 02:53:37 pm
BTW, NoMad, my daughter sent me a text at 11:45 this morning telling me she saw you on 316 at Bethlehem Road. She was in an NGMT ambulance.
Post by: mweldon on September 28, 2019, 06:26:59 pm
If you do replace your radiator for the LQ1 swap but want something with a bit more cooling capacity than the Champion, let me know.
I'm going to attempt a Griffin radiator install. It's been done before on a track fiero and worked nicely. Maybe we could bump our heads together and do a bit better install.
Post by: NoMad on September 28, 2019, 07:36:17 pm
As for the radiator swap, will really depend on what I find when I get the temp gauge running and get a chance to see if cooling is okay. That said, before the turbo it would be a near certainty to change out so we should talk about this plan...
Post by: GTRS Fiero on September 29, 2019, 10:03:07 pm
Post by: GTRS Fiero on September 30, 2019, 07:42:14 pm
Post by: NoMad on October 01, 2019, 10:24:13 am
I daily drive it despite it being so many colors and only partially done with the hood mods. I have spare panels I am prepping for paint and will be getting them all complete before I make the big switch.
Post by: NoMad on October 01, 2019, 05:12:37 pm
Fogot to check the plugs but will do so tomorrow. Planning to drop the exhaust once it cools down some tonight so I can clean it up, check for leaks, and paint it. Might also go ahead and remove the CAT at that time if I do have to do any welding on the pipe anyway.
Got most of my prep supplies now so I will probably prep a panel a night for the next few weeks and then set up the spray booth in the garage and get to work. Have to test the paint I bought and see if it is actually what ai am hoping for. If not it will have been a pricy experiment at the cost of Sherwin Williams automotive paint.
Post by: GTRS Fiero on October 01, 2019, 06:19:22 pm
Post by: NoMad on October 01, 2019, 09:29:01 pm
Post by: GTRS Fiero on October 01, 2019, 09:32:31 pm
Post by: Fierofool on October 01, 2019, 09:40:21 pm
Post by: NoMad on October 01, 2019, 10:05:29 pm
Post by: GTRS Fiero on October 03, 2019, 09:51:13 pm
Post by: NoMad on October 05, 2019, 09:39:59 am
Post by: NoMad on October 11, 2019, 04:10:01 pm
Plugs look good but it is driving like it is lean so I am guessing this motor really is on it's last leg. Going to really put my butt in gear to get the LQ1 ready PDQ.
Used a couple different products to try and strip old paint off the fiero to get down to a good surface to prime and paint. The "Aircraft" stripper method from the tech tips secrion did not work well at all. I ended up going out on a limb and trying an enviromentally safe, biodegradable, plastic and fiberglass safe stripper I bought at Sherwin Williams. Since the caustic nasty one failed to work much at all I figured this had no hope. It worked awesome! Was totally shocked. Once thw heavy top layers were pulled I started blocking it down to a nice surface to prime. Doing some filler work to really smooth out the panels for a really nice paint finish. This will be my first full paint so wish me luck. I expect to start painting on Tuesday if all goes well. Monday will be trying to finish preping the last panels and finish my hood mods. This round of paint will not include the sail panel sode scoops as they are not going body color and I am modding them before they get painted.
Lots of little stuff to go but one day at a time.
As for the motor, the milage has plumeted despite less pressure to the injectors so I am going to do another compression check but at this point it is all about getting the LQ1 ready and in rather than rehabing this 3.3L.
Post by: GTRS Fiero on October 11, 2019, 05:21:54 pm
Post by: NoMad on October 11, 2019, 08:57:28 pm
Post by: GTRS Fiero on October 11, 2019, 08:59:49 pm
Post by: NoMad on October 11, 2019, 09:02:25 pm
Post by: GTRS Fiero on October 11, 2019, 09:04:50 pm
Post by: NoMad on October 12, 2019, 08:17:30 pm
Exhaust comes out in the morning so I can try to sort this out.
Post by: NoMad on October 12, 2019, 10:25:00 pm
Post by: NoMad on October 14, 2019, 01:36:20 pm
Scince it is down anyway and thw cat is cut out I will replace that with straight pipe and do some clean-up. Not sure on the muffler but I will look at replacement options just in case.
I am starting to feel Really stumped here.
Post by: GTRS Fiero on October 14, 2019, 05:43:25 pm
How does it run, under load?
Post by: Fierofool on October 14, 2019, 08:22:22 pm
Post by: NoMad on October 14, 2019, 08:33:38 pm
Welded up and painted the exhaust save for the final joint. Will get it all hung and tacked before the final drop and weld. I am not a good welder and my buzz box isn't laying down solid beads on a 15 amp circuit and mine are still better than some of the ones that were on this one. Rewelded all the partial seams and ground the spatter and globs back before the paint. Likely this system will very much be temporary.
Will see what happens when I get it back in without the CAT. Will probably drop a new O2 sensor for good measure since it isn't something I can really test like the other items.
Each "solution" seems to be making it a little better but I really need to lick this soon.
Cradle and parts should be here this week so I can start getting the DOHC ready to go.
Really thinking more and more that a Megasquirt 3 system will be my ecu rather than a 7730. I want to go to non-waste spark to add in some tuneability and reduce the heat/wear on the coils. That and the turbo plan make tunning the MS3 seem like a much better option for not much more money.
Post by: GTRS Fiero on October 14, 2019, 08:41:01 pm
If you are on cruise, does your speed change?
Is the surge at set intervals?
Post by: NoMad on October 14, 2019, 11:55:48 pm
Post by: GTRS Fiero on October 15, 2019, 08:03:50 am
Post by: NoMad on October 18, 2019, 01:20:39 am
Car went back together this morning to take me to work. Did a full out stall at 70+ going south on 75. Lots of honking and angry gestures as I tried to get to the right side. Pushed in thw clutch to confirm and it showed 0 rpm. For diagnostic purposes I turned the ignition off then started the car while still rolling with clutch in. All symptoms gone. 10 miles later it started acting up again so I did the off-on trick. Cleared the problems a second time.
So basically I Should have called IT so they could tell me to turn it off then on again.
So an ECM is the likely culprit.
Also did it on the way home and same off and on cycle cleared it up.
That was a ton of trouble shooting, time, and money all spent only after following proper steps and research to find out it was the computer...
Reaffirms my plans to go MegaSquirt3 rather than a pick and pull 7730 or other gm ecm for the LQ1 swap.
Post by: Fierofool on October 18, 2019, 08:11:25 am
Post by: NoMad on October 18, 2019, 08:21:03 am
Post by: Fierofool on October 18, 2019, 09:26:54 am
Post by: TopNotch on October 18, 2019, 10:40:46 am
Post by: GTRS Fiero on October 18, 2019, 08:53:16 pm
Post by: Fierofool on October 18, 2019, 09:23:10 pm
Post by: NoMad on October 22, 2019, 01:41:14 am
Post by: Raydar on October 22, 2019, 08:45:59 am
For what it's worth, I had a chip that would quit working when the ECM got really hot. (I got a code "51" or something like that. "Missing PROM".)
The ECM reverted to "limp mode". I had reduced power and very rich operation (the "rich" might have been due to the big injectors I was running) and the A/C compressor was locked out. It also would pop and crackle on decel. The Check Engine light would flash very rapidly, like a strobe.
When things cooled off, everything returned to normal. (I had removed my firewall insulation. The ECM got HOT when I was stuck in traffic.)
If you see those symptoms, it's a pretty good bet...
Post by: GTRS Fiero on October 22, 2019, 05:58:29 pm
Post by: Fierofool on October 22, 2019, 09:24:28 pm
Post by: NoMad on October 22, 2019, 10:41:56 pm
I got into the ECU from the fastback tonight and found that there was an off the shelf EPROM performance chip from one of the big wonderchip shops. That led me down a rabbit hole that turned out to support my seems to be rich till it is hot then lean and stumbling like there is no fuel.... So if you EGR delete without a custom chip to remove the EGR function the car goes super lean. With the "wonder chip" it was likely getting hot much faster and thus causing the EGR to want to function and the motor to go lean and have the issues I have been dealing with. Looks like a custom chip might be the answer to this whole long thing. Ugh! Going to try to find a local tuner to burn one for me tomorrow a d if not I will find a fiero related retailer who will burn me one asap.
Ugh. Just Ugh. Even more reason to go MS3x when I swap the LQ1 in. No matter the motor I can just make thw changes myself!
Post by: GTRS Fiero on October 22, 2019, 11:00:26 pm
It would be interesting to know how that chip is programmed.
The EGR should only work during cruise--not idle or WOT. Basically, the EGR works when you let off the throttle after accelerating.
Did you use the chip in the loaner ECU to test?
Post by: NoMad on October 22, 2019, 11:05:10 pm
Ya, worry is it is part of the problem and thus as each bit went bad it all had to be redone.
I know the wonder chip doesn't have the egr deleted from the program cause it still throws the EGR code.
How much more will there be to sorting this all out????
Post by: GTRS Fiero on October 22, 2019, 11:09:49 pm
I did post that this was an "in-progress" thread. Hang in there. I think I have you beat for Fieeo troubles.
Post by: mweldon on October 23, 2019, 11:46:54 am
No, ran the eprom that was in the loaner ECU.
Ya, worry is it is part of the problem and thus as each bit went bad it all had to be redone.
I know the wonder chip doesn't have the egr deleted from the program cause it still throws the EGR code.
How much more will there be to sorting this all out????
Not sure how interested you are since you'll be doing the LQ1 soon but since I'm bypassing converting my car to a getrag manual first before the LF3/LF4 - F40 swap I just remembered I have a manual EGR deleted programmed EPROM I purchased from a vendor on fiero.nl. MIght have a couple more coded tidbits in it..can't remember off top of my head and will have to look up my PMs with the vendor.
Post by: NoMad on October 23, 2019, 02:23:03 pm
Post by: NoMad on October 23, 2019, 07:24:37 pm
Also ordered parts to improve the heatsink properties. Have an actual aluminum heatsink section, heatsink paste to put between all the points of contact, and am adding more space and possibly cooling fans into the center console I am building. I figure I can make all of that work with the stand alone ecu later so it is a good plan.
Wanted to get something accomplished so I did more bodywork tonight and got the Aramida bumper cleaned up and am going to have it ready to paint soon. Just leaves a few panels and she will be ready for paint.
Onward and upward and all that.
Post by: GTRS Fiero on October 23, 2019, 07:27:45 pm
Amida bumper cover?
Post by: NoMad on October 24, 2019, 07:32:44 pm
I have the Arimida FI512 bumper going on the car when I finish painting it and all the rest of the new panels plus the roof and rear clip that I will do on the car.
Post by: GTRS Fiero on October 24, 2019, 08:11:37 pm
Post by: NoMad on October 24, 2019, 10:14:39 pm
Also might have found my ECM solution.... F4 EBR boarded 7730. Gives me the GM maps and built in support network, a self learn tuneing function to speed up the process after changes, easy rewrites and code mask changes, the multiple in/out 5v circuits I wanted from the MS3x, simple install and simple to adjust when I swap motors, and less money than almost any other ECM option. Plus it will allow me to use inputs from a wideband O2, intake air temp, and a stacked 1 bar and 3 bar map sensors to get truly factory level smoothness even with the turbo LQ1. By using a remanufactured unit from summit I get essentially an all new ecu with everything I want. Seems a no brainer for me at the moment. Will likely order one tomorrow after I get the final questions answered by the company in the morning.
Post by: GTRS Fiero on October 24, 2019, 10:28:35 pm
Whenever you hold forth on this stuff, I feel...stupid. Don't read the technical portions of the newsletter.
Post by: NoMad on October 24, 2019, 10:51:18 pm
I just ordered a new set of connectors for the 7730 ecm side of the harness. Does anyone know if we have an ecu to firewall pigtail in the parts barn? It would allow me to prep the swap pigtail to speed the process and then I could replenish it with the stock pigtail from the formula fastback after I swapped ECUs.
Post by: GTRS Fiero on October 24, 2019, 11:04:47 pm
Post by: Fierofool on October 24, 2019, 11:40:40 pm
Post by: scottb on October 25, 2019, 04:30:58 pm
Post by: NoMad on October 25, 2019, 08:02:04 pm
Post by: NoMad on October 25, 2019, 08:10:00 pm
Post by: GTRS Fiero on October 31, 2019, 10:34:50 pm
Post by: NoMad on November 02, 2019, 02:19:16 pm
Lastly I have to figure out how to get the data from the provided CD into my laptop as the CD drive has been dead for a few years now. I got the new battery for it the other day so I should have plenty of life in it to do data logging and tunning runs once it is up and running.
Also, I spent the money on getting a nice bluetooth ALDL set up. It runs well and gives decent info. However trying to load the data tracks into TunerProRT has left me stumped as I am not getting any usable info from it. Likely an error on my part as I have never done this style of tuning before.
Hope to get the computer install roughed in tomorrow and hopefully get to tuning soon after. I would like to stop driving the truck everywhere.
Post by: GTRS Fiero on November 02, 2019, 06:11:47 pm
For the CD, if no one else has a drive, you can use the optical drive on a computer at the library, or buy a USB DVD drive, or probably download the software.
Post by: NoMad on November 02, 2019, 10:44:30 pm
Post by: NoMad on November 06, 2019, 12:21:32 pm
Got the new computer in and wired. Got the TunerPro stuff working. Got the car to fire but not idle/run.
Research last night showed me I missed a splice listed in the 7730 ecm conversion addendums. Will do that this afternoon.
Fully removed the EGR and all related components. Fabricated a new block off that I painted and will install today.
Knock sensor and related circuit is now wired and looks to be functional according to my data logger.
Hope to get it all back on the road today with a base tune.
Post by: GTRS Fiero on November 06, 2019, 06:46:56 pm
Post by: NoMad on November 07, 2019, 10:57:15 am
Got the car running and did some initial tune drives. Really liking the new computer and the interface. The VE tune works very well to get a good base. Still have work to do in the open loop idle to get it running smooth but such is the learning curve.
I also got the surging again! The interface allowed me to see an o2 sensor overload at the same time so I will have to see what is going on. Since they are the only thing I haven't changed, I am going to throw on new plug wires and a cap and rotor just to see. They tested fine but who knows.
Going to get sometime in tuner pro to go over the data logs this morning.
Post by: GTRS Fiero on November 07, 2019, 05:56:42 pm
Post by: NoMad on November 07, 2019, 10:30:51 pm
Post by: GTRS Fiero on November 07, 2019, 10:34:51 pm
Post by: Fierofool on November 08, 2019, 07:49:10 am
Post by: GTRS Fiero on November 08, 2019, 08:06:10 am
Post by: NoMad on November 08, 2019, 08:33:14 am
The FPR is still the adjustable one from when I bought the car.
Post by: Fierofool on November 08, 2019, 01:59:51 pm
Post by: NoMad on November 08, 2019, 04:03:15 pm
Post by: NoMad on November 08, 2019, 04:07:17 pm
Spent a few hours today working on the new cradle so I can get it off to powder coating hopefull early next week. Stripping the junky paint work done by the guy I bought it from and cleaning it up a bit. Removing weld spatter from the factory and beefing up all the engine and tranny mounts. To keep from having problems.
Post by: Fierofool on November 08, 2019, 06:13:31 pm
BOSCH LBS/HR CC/MIN GRAMS PSI BAR
0-280-150-901 18.55 195 140.2 43.5 3
Post by: GTRS Fiero on November 08, 2019, 06:19:50 pm
I am just viewing this tuning learn as preperation for the 3.4 TDC NA and then finally once the Turbo goes on. Crawl, run, walk and all that.
Spent a few hours today working on the new cradle so I can get it off to powder coating hopefull early next week. Stripping the junky paint work done by the guy I bought it from and cleaning it up a bit. Removing weld spatter from the factory and beefing up all the engine and tranny mounts. To keep from having problems.
I'm glad you're taking your time to do this correctly. Whatever else, I always appreciate a job well done. Forethought, patience, and care always pay off.
Post by: GTRS Fiero on November 08, 2019, 06:21:58 pm
Post by: GTRS Fiero on November 08, 2019, 06:23:20 pm
That is their rated flow, not what I am getting from them. I have not measured what they are actually flowing.
The FPR is still the adjustable one from when I bought the car.
There are known issues with the adjustable FPR, but the adjustable FPR should not be used with the 7730.
Post by: Fierofool on November 08, 2019, 06:26:04 pm
https://www.motormanfuelinjection.com/Fuel_Injector_Flow_Rates.html
Post by: GTRS Fiero on November 08, 2019, 06:30:10 pm
Post by: Fierofool on November 08, 2019, 07:03:33 pm
Post by: NoMad on November 10, 2019, 05:12:32 pm
To that end I just finished reinforcing my engine and tranny mount points on the mew cradle. They are now massive and very beefy. Tomorrow I hope to get it off to the powder caters. If my morning is productive the second stearing rack body will join it so I can get to rebuilding that one. Both will be done in a wet black powder coat. The intake and valve covers will go in the next batch with a few other odds and ends as they will be getting done in a turbine bronze/orange color to match the planned strip and the interior accents.
Last big choice is if I send out my 282 for rebuild or attempt it myself....
Post by: NoMad on November 11, 2019, 12:37:52 pm
Post by: NoMad on November 12, 2019, 08:27:47 pm
It is nice and smooth now and should be good for the next 20 years I would guess.
Also on this Rock Auto order were a bunch of gaskets for the LQ1 as well as a new timing belt. While these motors have never run I want to tear down the top end to get a look and make sure all is okay. With the age of the motors I wanted the spare timing belt incase I see any signs of dryrot. Plus it doesn't hurt to have a spare on hand. Will probably port match and polish the heads while they are off and other parts are at thepowder coated. With the gaskets in hand I can actually get stuff going together on the swap front.
Headed out for five days so likely not a lot will be happening till next week.
Post by: mweldon on November 13, 2019, 10:28:31 am
Post by: NoMad on November 13, 2019, 11:53:14 am
Post by: NoMad on November 24, 2019, 02:39:28 pm
Got the rest of my parts for the rack in but have not finished the last bits (save the dust cover off the bottom of the rack I will have to take from my current one or find another) of install work.
Also started gasket matching and polishing the upper and lower intake manifolds. Been doing tons of reading on theory and techniques and have a bit of a plan in order. Managed to have all four of my mandrels break. As they were harbor freight ones I am not really surprised. Ordered more as well as longer ones and a set of die cutters for rough cutting.
Also spent the morning today building a new computer tray from aluminium flat bar to accomidate the new ecu. Have it all bent up and will rivet it together and do the grinding and finishing after Marilyn's family leaves.
Havey initial measuents taken and rough markings made for building my new one-piece center console. Plan to build it as a buck and then make a mold so I can build repeatable consoles from fiberglass and upholster them. Cup holders will be happening as well as better ECU cooling.
Also have the cradle finished after getting it back from the powder coater's. The semi-gloss black looks great and matches well with the new engine and transmission mounts from Rodney's.
Last maintenance task is to check and eother clean/lube or replace the IAC valve as that is the last non-injector issue this surging could be.
Post by: Fierofool on November 24, 2019, 05:08:10 pm
By one piece console, do you mean from dash to firewall? Wouldn't that be difficult to get in and out?
Post by: NoMad on November 24, 2019, 07:16:02 pm
And yes, from firewall to in front of the shifter. Have seen a few other folks with them and really like the look. Plus the strength and ability to adapt to finished piece to exactly what I want before upholstry means I can fine tune it before upholstery without having to rebuild the frame over and over till right. Plus if it comes out how others like I can make extras from the mold easily and quickly.
Post by: NoMad on December 01, 2019, 08:12:12 pm
Really thinking hard about a change to an F23 as well. Would mean buying two of them to get the right bellhousing and final drive ratio but that is the reality of our little lives configuration.
Post by: GTRS Fiero on December 01, 2019, 08:15:18 pm
Post by: NoMad on December 01, 2019, 09:11:55 pm
Not sure if I will go with the quaife limited slip when I do it. Like this project needed another $1k+ part...
Post by: mweldon on December 01, 2019, 09:27:04 pm
Forced induction LQ1.... then you might start thinking of one...
Post by: Raydar on December 02, 2019, 07:46:09 am
Also, IIRC, it seems like top gear RPM at a given speed is slightly less than the Fiero Getrag.
(Edit - If it's the 3.84, it's within 10-15 RPM of the Fiero Getrag. http://www.fieroinfo.com/speedcalc.html )
I thought about finding an Ecotec version, and swapping the clutch housing, but using that one also requires shortening the input shaft by ~3/8". It also provides several mounting challenges, if I've understood correctly.
Steve
Post by: NoMad on December 02, 2019, 09:26:13 pm
Raydar: like above, I figure if I am cracking the cases to make the swap shortening the input shaft while it is apart isn't the end of the world. Any of the local shops should be able to handle it quick and cheap enough if I can't do it myself.
Post by: Fierofool on December 03, 2019, 07:56:15 am
Post by: mweldon on December 03, 2019, 12:26:20 pm
Eagle Automotive Machine
1240 Atlanta Hwy # C, Auburn, GA 30011
If so, cool...too bad he's in BFE compared to Marietta...
You can shorten the input shaft rather easily... Justin Bart did it by taping the input shaft to where it needed to be ground down to then hooked a high torque drill with hex bit into the exposed intermediate shaft once the seal is removed from inside the bellhousing and using the drill to rotate the input shaft at a good speed. Then used an angle grinder to grind down to the tape. Redneck engineering at its best but worked like a charm... It's in his F23 thread on pennocks but the photobucket images might be snafu'd...
http://www.fiero.nl/forum/Forum2/HTML/121743-2.html
Post by: Fierofool on December 03, 2019, 01:05:17 pm
Post by: NoMad on December 03, 2019, 06:16:31 pm
Post by: GTRS Fiero on December 03, 2019, 06:58:56 pm
Post by: NoMad on December 06, 2019, 03:03:44 pm
Post by: NoMad on December 09, 2019, 04:22:08 pm
Going to order my clutch in the next day or two once I am able to determine what I am going with that will hold under the turbo and be streetable.
Post by: NoMad on December 11, 2019, 07:08:27 pm
Also got my wideband O2 controller finally as well as the rod end seals for the rear suspension upgrade part 2.
Thinking about going with a bully stage 3+ but want to talk to them first. Heard very good things though.
Out of curiosity, are people enjoying the updates/still caring about what happens with the car?
Post by: GTRS Fiero on December 11, 2019, 07:15:42 pm
It would seem to be important that we share our enthusiasm for our carsb if we can't find interesting things to share about them, no one will. This also shows life in the club. When I don't hear about updates, I ask.
Of course, that's just me.
Post by: Fierofool on December 11, 2019, 07:23:51 pm
Post by: GTRS Fiero on December 11, 2019, 07:29:05 pm
Post by: Raydar on December 11, 2019, 07:50:48 pm
Post by: NoMad on December 11, 2019, 10:53:16 pm
Yes, pictures sure help me, and makes the thread more interesting. These rod end seals are not making sense to me. Maybe I'm thinking the wrong thing.
The rear lateral control arms and bushings are being replaced with a rod and rod ends to help tighten up the rear even more. I purchased seals for the rod end bearings to try and prolong them.
As for pictures, I do 90%+ by phone and need to go to my computer to hyperlink in the photos.
Post by: Fierofool on December 11, 2019, 11:18:47 pm
Post by: MikeMac on December 12, 2019, 04:13:32 am
Throw some pics up on the Facebook Fiero group too or maybe I already saw some there?Yes, pictures sure help me, and makes the thread more interesting. These rod end seals are not making sense to me. Maybe I'm thinking the wrong thing.
The rear lateral control arms and bushings are being replaced with a rod and rod ends to help tighten up the rear even more. I purchased seals for the rod end bearings to try and prolong them.
As for pictures, I do 90%+ by phone and need to go to my computer to hyperlink in the photos.
Post by: mweldon on December 12, 2019, 02:20:40 pm
Post by: Fierofool on December 12, 2019, 03:13:38 pm
Post by: Raydar on December 14, 2019, 09:00:06 am
88 cradles are infamous for cracking at the trans mount on the front cradle rail.
http://www.fiero.nl/forum/Forum4/HTML/078290.html
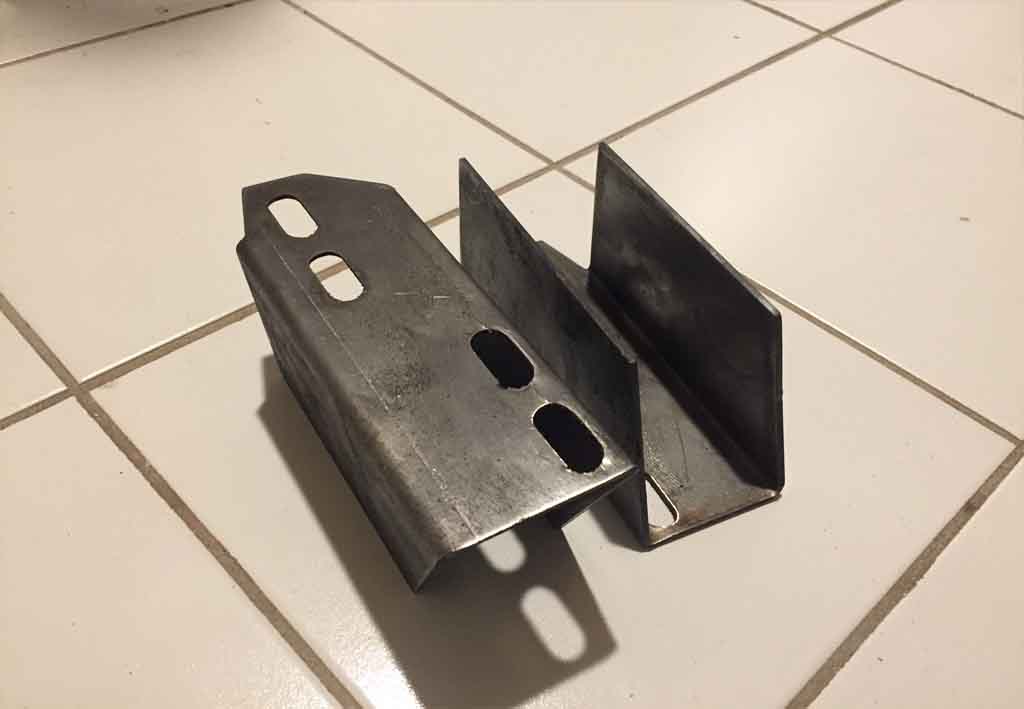
Post by: Fierofool on December 14, 2019, 09:05:26 am
Post by: scottb on December 14, 2019, 09:30:21 am
Post by: NoMad on December 14, 2019, 02:54:01 pm
Post by: NoMad on December 16, 2019, 11:03:31 pm
Truck brakes were fun.... But I did get the rear fixed and new pads installed. I will do thw fronts tomorrow. That then gave me time to try and see what the car was doing. I did a VE learn drive and the stalling was still making it all but undrivable. Got it home and opted to try and solve it by adjusting the throttle plate stop. (This was suggested by the manufacturer of my ecu) I took some fiddling in the dark and it is far from perfect but it now runs without stalling again! I wasn't able tp get thw perfect 25 steps on the IAC at warm idle but it at least lives again. Did an extended drive and the feeling of the car wanting to cut out happened a few times but didn't actually cut out this time. Sort of hiccups then right back to normal.
With so many component changes it is hard to be certain, but the cutting out/surging might have been rooted in a bad IAC valve I had been tunning around.
Post by: GTRS Fiero on December 16, 2019, 11:29:37 pm
Post by: NoMad on December 17, 2019, 04:12:26 pm
Post by: NoMad on December 18, 2019, 11:22:26 pm

This is the cradle as I received it. The photo makes it look much better than it was. It was a krylon industrial red spray can job and the cradle wasn't even clean first so the whole thing was just ugly once you got up close.

This is the start of the cradle reinforcement at the transmission mounts.

All three sides tacked in place and ready for final welding. The bottom/top piece has already been welded all around before this was taken.

All welded up. Ugly but it will be more than strong enough now, even at the 400whp range I am expecting after the turbo.

Starting the rear transmission mount reinforcement. You can see the size of the flat bar I am working with.

Both plates welded in.

Fabrication finished on the rear mount point.

The underside of the front mount point.

And the top side giving an idea of how beefy it is now.

The cradle back from powder coating.
Now on to the other stuff.

The steering rack I am rebuilding getting sprayed.

All new parts for this baby.

And the rack 90% done.

Let the porting begin. Layout starting for the upper intake manifold.

Here is the exterior polishing of the intake. The photos aren't here but trust me that the manifold was port matched and polished out to 400 grit.

And they all went off to powder like this. High points are all polished up.

And starting to port and polish the lower intake.

The first passage shaped and smoothed to 80 grit. I started with burrs to remove the bulk material.

Not the best photo but you can see the manifold done out through 120 grit cross-buff. Will take to 180, 320, and possibly 400 grit buffs as soon as I find a minute.
The heads should be coming off on Sunday or Monday so i can start those as well as prepping the block by camfering the oil return passages, improving the distributor block off with an improved o-ring as well as a gasket, welding the oil pump pickup arm so it can't move, and swapping the dipstick to the trunk side of the motor.
Started cleaning the F23 to get it ready to paint.
Hope to order the new clutch next week if I can find what I am looking for. Will probably call Bully Clutches as they seem the least horror storied of the improved clutch manufacturers.
Post by: Raydar on December 18, 2019, 11:58:28 pm
....swapping the dipstick to the trunk side of the motor.
How are you doing this? Just going in through the side of the pan?
Post by: NoMad on December 19, 2019, 11:45:57 am
Post by: GTRS Fiero on December 19, 2019, 06:13:09 pm
Post by: NoMad on December 19, 2019, 08:12:39 pm
Post by: NoMad on December 24, 2019, 09:32:31 am
Trying to order a clutch for the car now which is turning into a bit of a rough process but such is the nature of custom.
Post by: NoMad on December 29, 2019, 07:16:23 pm
Post by: GTRS Fiero on December 29, 2019, 07:21:10 pm
Post by: NoMad on December 29, 2019, 07:58:03 pm
Post by: Fierofool on December 29, 2019, 08:03:54 pm
Post by: GTRS Fiero on December 29, 2019, 08:06:02 pm
Post by: scottb on December 29, 2019, 08:14:57 pm
Post by: NoMad on December 30, 2019, 01:30:30 pm
Post by: GTRS Fiero on December 30, 2019, 05:50:49 pm
Post by: NoMad on December 31, 2019, 11:48:32 am
Post by: NoMad on January 15, 2020, 10:07:06 pm
Had to move the car today so I gave it a bit of a run for the first time in over a month I think. Did about an hour but probably shouldn't have as the stumble and cut issue is really bad. Even as is I still love to drive her. Really looking forward to the new motor and trans being in.
Post by: GTRS Fiero on January 15, 2020, 10:11:05 pm
Was the cause of the stumble ever determined? Ground?
Post by: Fierofool on January 15, 2020, 11:00:56 pm
Post by: NoMad on January 16, 2020, 12:36:28 pm
Not sure if I will rebuild this one when I pull it or not.
Post by: Raydar on January 16, 2020, 05:19:53 pm
...
Not sure if I will rebuild this one when I pull it or not.
If it really is a 3.1, bored out to 3.4 (as I was told by Dave) then there probably isn't enough cylinder wall thickness for an overbore. You might get away with a "hone and re-ring".
Post by: GTRS Fiero on January 16, 2020, 05:51:23 pm
Post by: Fierofool on January 16, 2020, 07:01:07 pm
Post by: GTRS Fiero on January 23, 2020, 08:56:58 pm
Post by: NoMad on January 24, 2020, 12:54:44 am
Post by: NoMad on March 18, 2020, 11:55:29 pm
Went for a test drive and thought I might have it sorted....then 30 minutes into testing the surge came back and worse than ever. Wasn't the ICM.
At this point I am officially done trying to drive the car until the motor swap is done. There is something major wrong with either injectors or ignition and it is bad enough that it nearly got Marilyn and I killed on 285. So ya, no more money or time into this engine till I have the new running gear in.
So with upcoming body changes and a motor and transmission swap to soon be completed, this might be the end of the formula fastback for good. The new iteration will deserve a clean slate name going forward.
Post by: GTRS Fiero on March 19, 2020, 12:00:18 am
Post by: mweldon on March 19, 2020, 12:23:25 pm
:o
Post by: GTRS Fiero on March 19, 2020, 06:37:30 pm
Post by: mweldon on March 20, 2020, 11:36:39 am
mweldon, are you going on RFTH, this year?
In my fiero, who knows as I may actually finish the LF3/LF4 swap with all the quarantining going on....
Otherwise if I go I'll be driving my Mazda.
The better question or rather statement is.... I hope GaFiero.org can have the RFTH this year with all that's going on....
BTW, serious kudos to NoMad for coming over and helping me out with the last engine mount for my swap... I was kinda worn out from all the cutting, grinding, shaping, test fitting, grinding, testing, grinding, welding, grinding from the first 3 mounts... His enthusiasm was seriously needed and I let him take over the welding and grinding while I did the drilling, tapping and spacing for the last mount. Well engineered engine mounts are a @#$%!
Post by: Fierofool on March 20, 2020, 12:39:28 pm
Speaking solely for myself since I've had no input from any of the other board members, I don't know if the event will take place this year. It's too early to make that decision. Government speculation is that this virus could still be a major problem as far out as 18 months. That could put us as far out as the end of 2021.
Post by: NoMad on March 25, 2020, 07:01:26 am
Post by: GTRS Fiero on March 25, 2020, 08:05:02 am
Post by: Fierofool on March 25, 2020, 08:47:55 am
Post by: GTRS Fiero on March 25, 2020, 05:59:36 pm
I know you have a new fuel filter on the car but when you remove the old injectors, look in the top to see if there's any crud there. One of those sites we looked at suggested to always replace the fuel filter any time new injectors were installed. If there's crud there, I'd change the filter again.
When we replaced the injectors in the Fastback Formula, the tops of several injectors were totally plugged even though the car got a new filter.
It almost seems as if the injectors are plugged again. Or, could be a bad FPR.
Post by: NoMad on March 25, 2020, 10:16:50 pm
I went ahead and removed the wing today and glassed in the holes. It was on my list but since it had begun to leak into the trunk again even with the new gaskets. So tomorrow after work I will start sanding and finishing the deck lid.
Got the T-tops in the Vette cleaned up, painted the lips, and installed new seals.
Hope to be in the warehouse on the 2nd or 3rd of April so the real work can begin. Hopefully the new motor and trans will be in and tuned by the end of the month. The Vette should be daily drivable by then as well. Also going to work on getting the parts Vette up and running as well.
Going to be a busy month of shelter in place.
Post by: GTRS Fiero on March 25, 2020, 10:25:18 pm
Post by: NoMad on March 25, 2020, 11:29:49 pm
Post by: GTRS Fiero on April 19, 2020, 09:10:07 am
Post by: NoMad on April 19, 2020, 02:54:19 pm
Lots of irons in the fire right now and my team just rotated back on for the time being so I am working 4 on 3 off 3 on 4 off till they say otherwise.
Post by: GTRS Fiero on April 19, 2020, 03:01:16 pm
Post by: Fierofool on April 19, 2020, 03:34:18 pm
Post by: NoMad on April 22, 2020, 09:34:45 pm
Not happy if I have to go have the brand new motor bored over and new pistons before it even runs.
Cause of the water I will end up pulling down all the bearings and putting new assembly lube in each and prepping it for start up over again for the factory.
I am glad I pulled the heads for porting though as it means I cought this before I nuked something on start up due to no assembly lube and a rusty bore.
Post by: GTRS Fiero on April 22, 2020, 09:49:27 pm
Post by: Raydar on April 22, 2020, 09:50:27 pm
Post by: The Art Doctor on April 22, 2020, 10:46:29 pm
Post by: mweldon on April 23, 2020, 02:50:12 pm
Replace the intermediate cam / jackshaft cam bearings with SBC cam bearings... the OEM LQ1 CAM bearings have a tendency to disintegrate ..
https://www.wot-tech.com/wide-cam-bearings.html
Also saw they have these as you were asking about them as well (didn't know they had them offered)
https://www.wot-tech.com/arp-flywheel/flex-plate-bolts.html
Post by: NoMad on April 23, 2020, 10:32:13 pm
Post by: mweldon on April 24, 2020, 12:35:47 am
Post by: GTRS Fiero on April 24, 2020, 07:43:26 am
Post by: GTRS Fiero on September 05, 2020, 08:06:18 am
Post by: Fierofool on September 05, 2020, 08:18:30 am
Post by: NoMad on September 06, 2020, 09:06:28 pm
That said progress has been made.
MWeldon and I rebuilt out shifters with the rodney ultimate rebuild kits. We went as far as to POR15 them so no more issues with them rusting again.
I also have a GIANT stack of parts for the motor now. I had the block bored and had to order new pistons and rings to accommodate. I also have new stiffer valve springs, better seals, and titanium retainers. Should help let her spin past the 7400 mark without stress.
Also, managed to score a killer deal on the turbo I wanted for the car (GTX3076r) for $300! It needs some TLC but the parts are sub $200 for the whole rebuild so into an almost $1900 turbo for ~$600 after balancing.
Still need to finish porting the heads, get the crank balanced and polished, and source another exhaust manifold.
Most of my car time has been spent trying to get Marilyn's Vette restoration back on track. The heat stopped us dead in our tracks for awhile.
Post by: GTRS Fiero on September 06, 2020, 09:18:41 pm
I'm glad you're busy at work (gotta make money to pay the bills, right?).
Thanks for the update.