Post by: jwrape on April 19, 2011, 10:34:32 am
Here are the pics from it's original form.
No brake fluid in the rear section of the brake resivoir... Telling me there is a leak I should be looking for. The extra brake fluid bottles gave it away as well
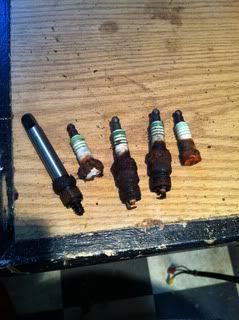
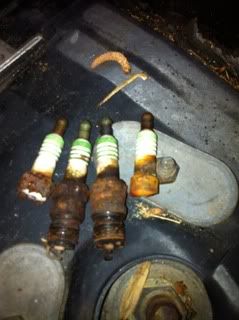
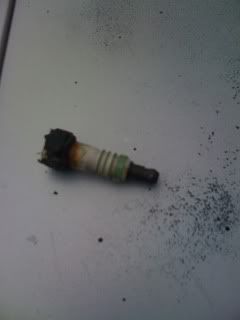
The #1 spark plug was broken off. This might have been why it stopped running for the previous owner, who knows
http://img.photobucket.com/...iero/Brokenplug1.jpg (http://img.photobucket.com/albums/v177/jwrape/Electric%20Pontiac%20Fiero/Brokenplug1.jpg)
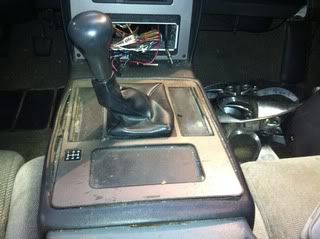
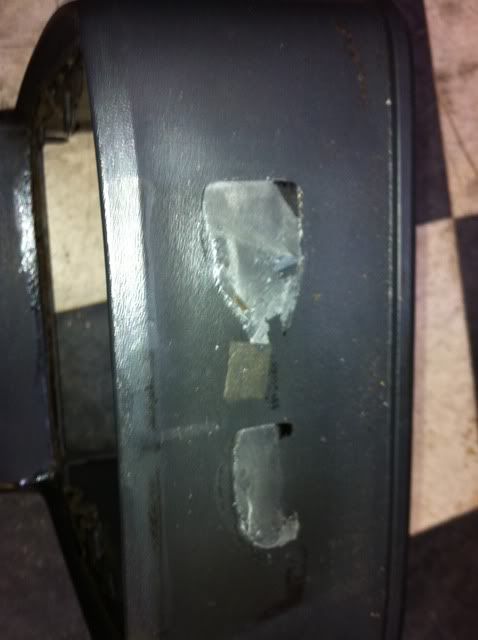
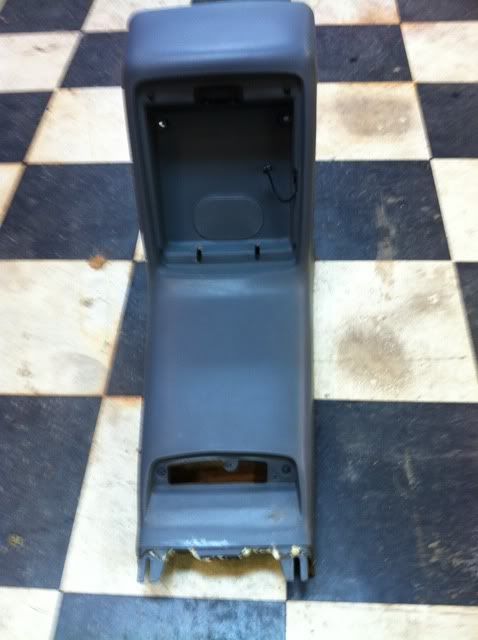
The center Console had some heat issues. Gonna have to fix this
http://img.photobucket.com/...nsolecompartment.jpg (http://img.photobucket.com/albums/v177/jwrape/Electric%20Pontiac%20Fiero/Consolecompartment.jpg)
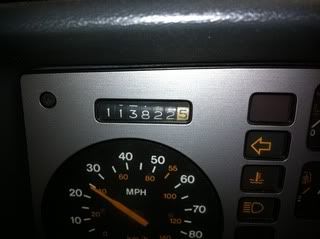
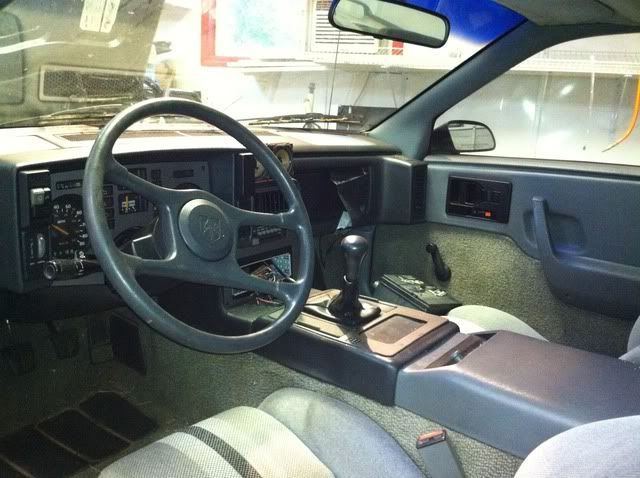
Dash
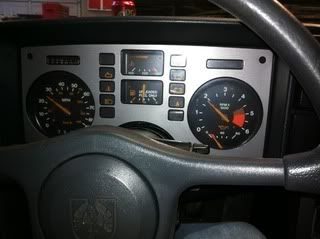
Center Dash
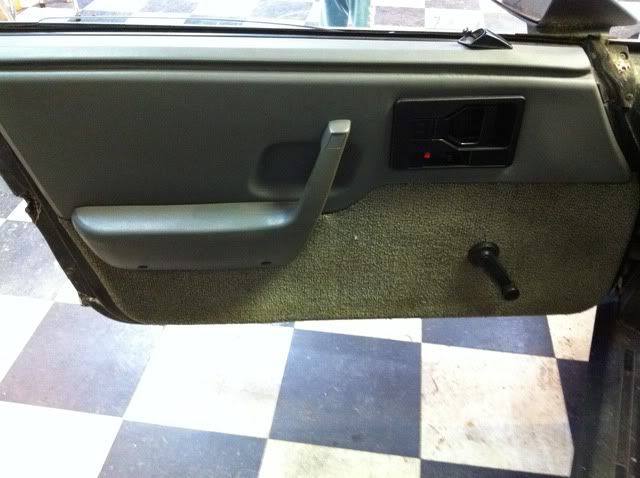
Driverside door, pretty clean as the passenger side is as well
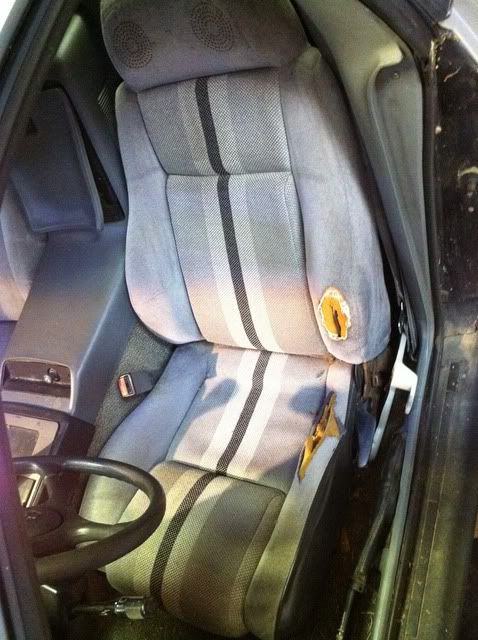
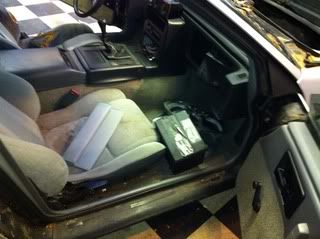
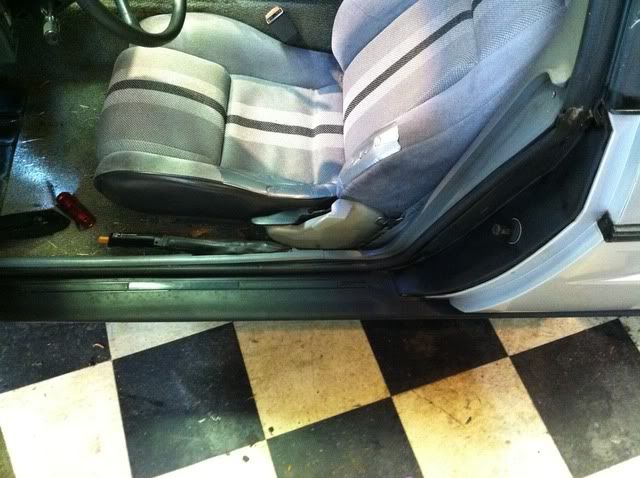
Drivers seat as it came to me
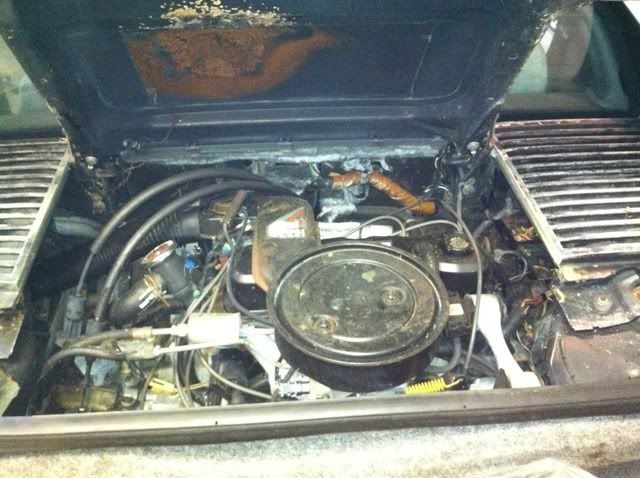
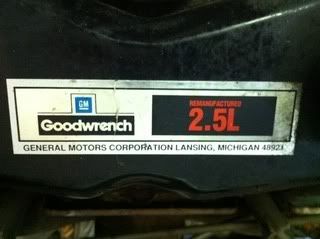
Engine from afar looks decent and complete
http://img.photobucket.com/...%20Fiero/Engine2.jpg (http://img.photobucket.com/albums/v177/jwrape/Electric%20Pontiac%20Fiero/Engine2.jpg)
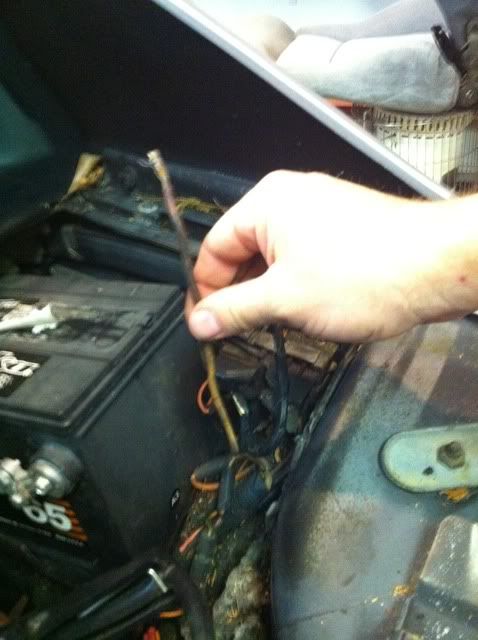
This is the headlight wire harness. This red wire was sticking out and chaulky for some reason. I haven't touched it, it looked like this. But the headlights work after helping them up.
http://img.photobucket.com/...ightFusableLink1.jpg (http://img.photobucket.com/albums/v177/jwrape/Electric%20Pontiac%20Fiero/HeadlightFusableLink1.jpg)
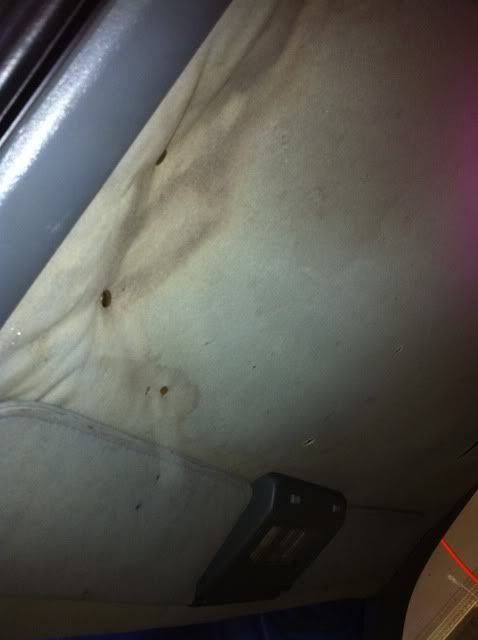
Headliner is trash
Interior looks decent
Original miles of 113k
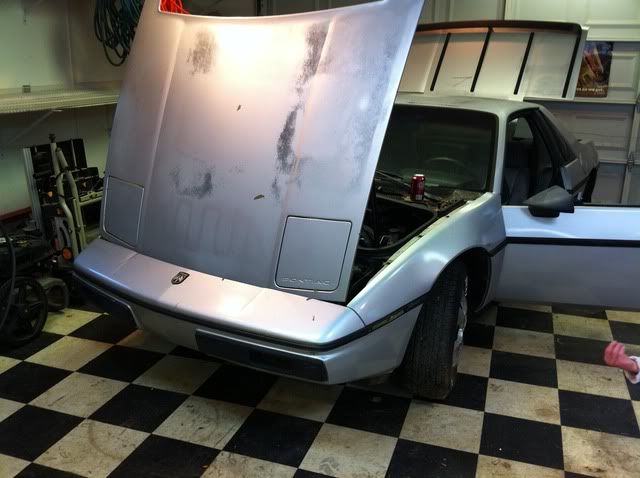
The ol' girl sitting in the shop
http://img.photobucket.com/...c%20Fiero/OlGirl.jpg (http://img.photobucket.com/albums/v177/jwrape/Electric%20Pontiac%20Fiero/OlGirl.jpg)
Passenger seat
Center shifter
Sorry about some of these pics being HUGE. I have resized them down but can't seem to fix all of them, Hopefully you can still see them. I will take smaller versions the rest of the way through the rebuild
Post by: jwrape on April 19, 2011, 10:35:01 am
http://img.photobucket.com/...iero/Brokenplug1.jpg (http://img.photobucket.com/albums/v177/jwrape/Electric%20Pontiac%20Fiero/Brokenplug1.jpg)
The spark plug area was covered in Acorn mess and grease etc.... Had to dig it all out with a small screw driver, then vacuum and then lubricate with some PB blaster.

I found these two plugs just sitting there with no where to plug into
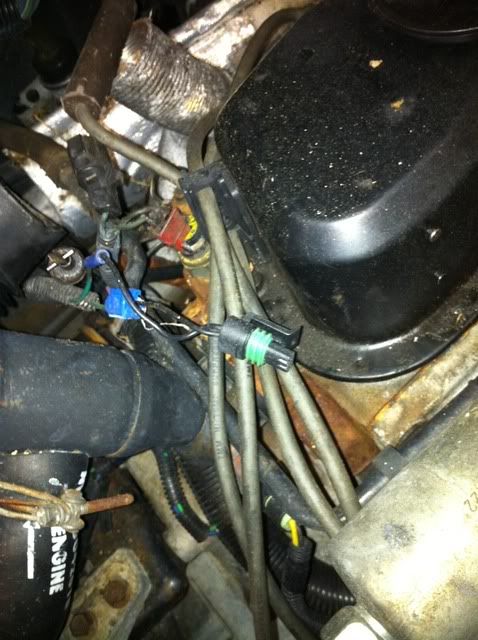
You can barely make this one out in the pic. It is a single pin plug, looks like a temperature sensor plug or something, but no where for either to plug into
Then I removed the air filter and found this open hard vacuum line.
Then went up into the front trunk and found this disconnected from itself. Looks like a vacuum check valve or something
When removing the air filter, I found this blue sensor melted in the air cleaner
The plugs and around them were covered in acorn debre'
Post by: jwrape on April 19, 2011, 10:35:30 am
Then I moved onto the front brakes that were siezed up since we bought the car. They were bascially rusted together. The car would BARELY roll even under the force of a come along and then trying to get it off the trailer was rediculous and funny at the same time.
Here you can see after I removed the rotor, caliper, and sheild that both my Tie Rod ends are trashed. No wonder the alignment is SO off I can see it by eye.
http://img.photobucket.com/...20Fiero/Spindle3.jpg (http://img.photobucket.com/albums/v177/jwrape/Electric%20Pontiac%20Fiero/Spindle3.jpg)
http://img.photobucket.com/...20Fiero/Spindle2.jpg (http://img.photobucket.com/albums/v177/jwrape/Electric%20Pontiac%20Fiero/Spindle2.jpg)
http://img.photobucket.com/...20Fiero/Spindle1.jpg (http://img.photobucket.com/albums/v177/jwrape/Electric%20Pontiac%20Fiero/Spindle1.jpg)
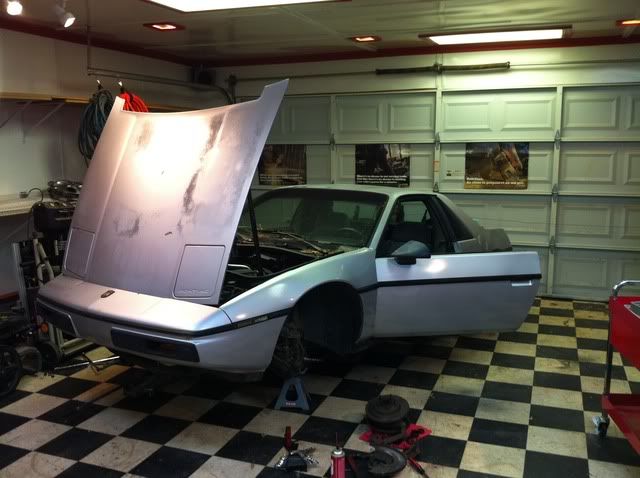
Before the brakes were removed
After the brakes have been removed and also how it sits at the moment until I can get the Grand Am rotors to have them fitted up
Post by: jwrape on April 19, 2011, 10:35:48 am
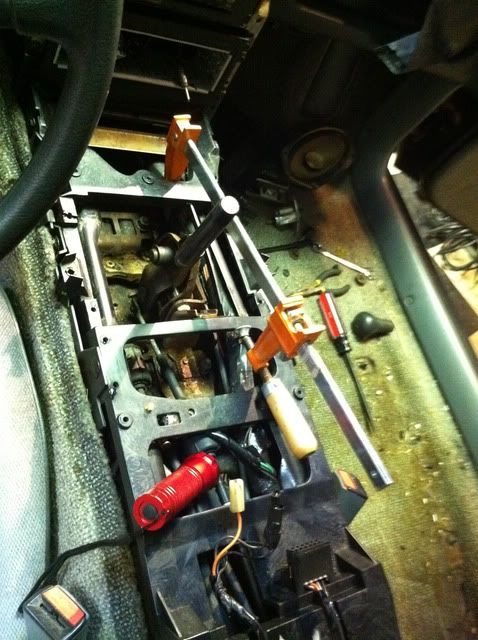
I removed the center console and the passenger seat so far. I have started and almost completed re-attaching the vinyl to the plastic around the console and it's pieces.
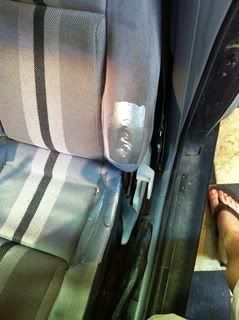
I duct taped up the hole in the seat to keep it from getting worse. I'm not a fan of Duct tape but it works in this case until I can get covers
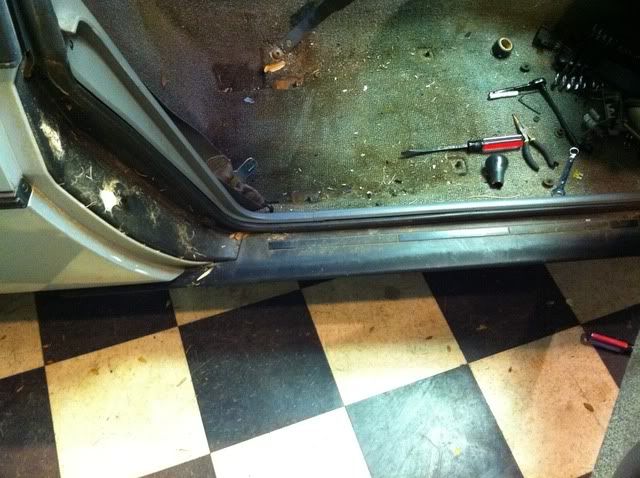
Here is the door jam I cleaned up
Here is the what it looked like before I cleaned it up
The interior before I took it apart
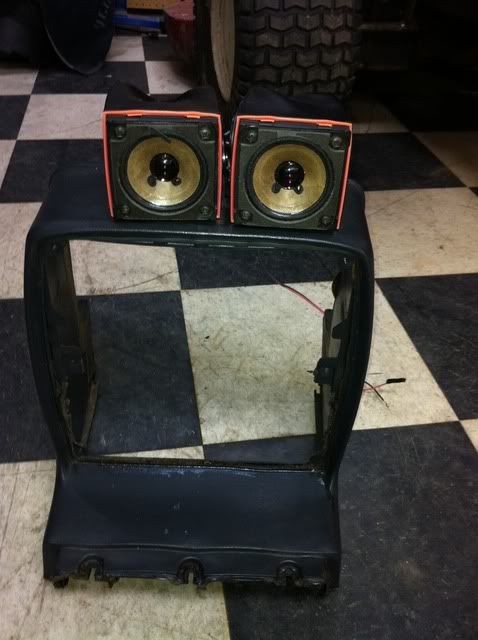
As you can see here, the PO had super glued some crap speakers onto the top of the radio/AC controls that were rediculous
I took it all apart and started cleaning with Purple Magic and paper towels. It was a hot mess and NASTY under all that plastic
Did some skeliton repairs
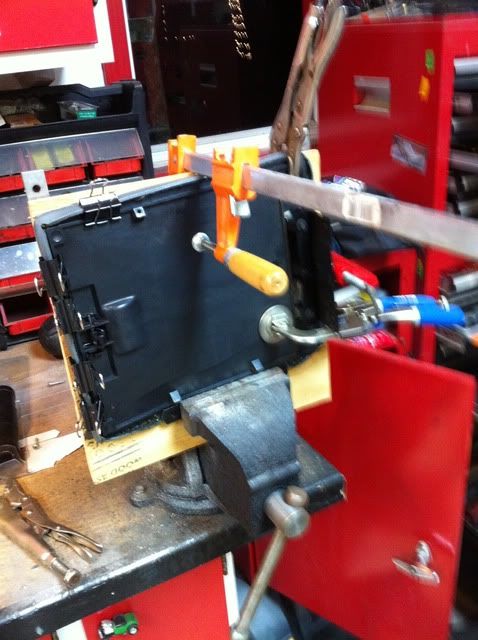
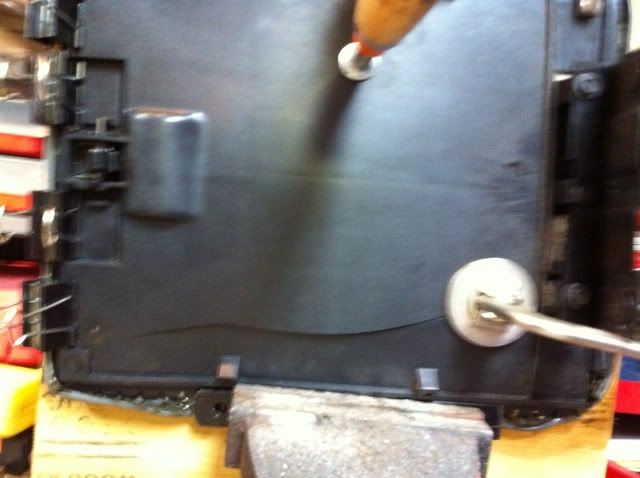
Ended up cracking the center console door
This hidious speaker install
Center console cleaned up
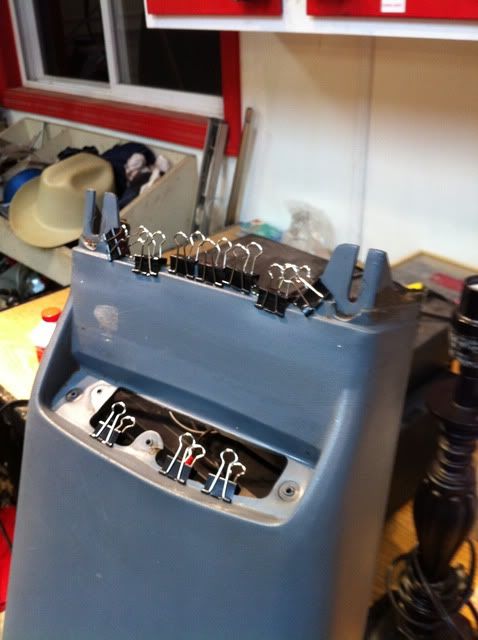
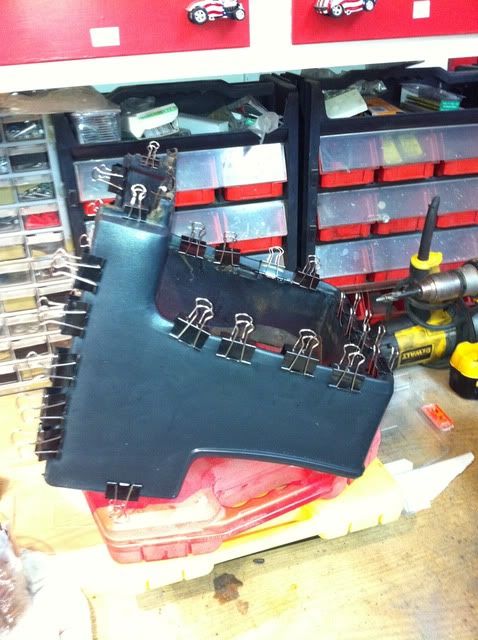
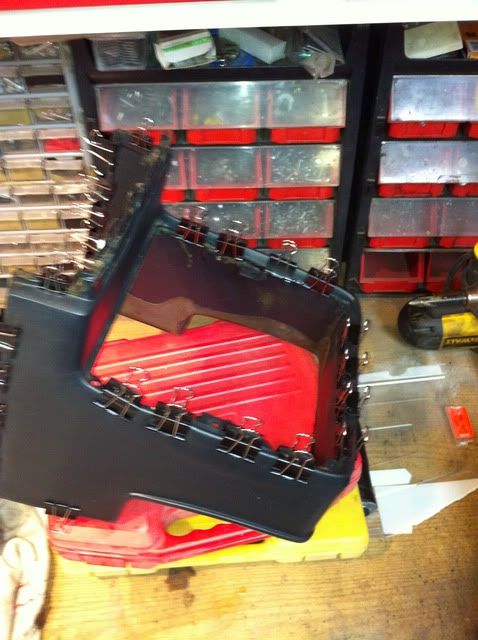
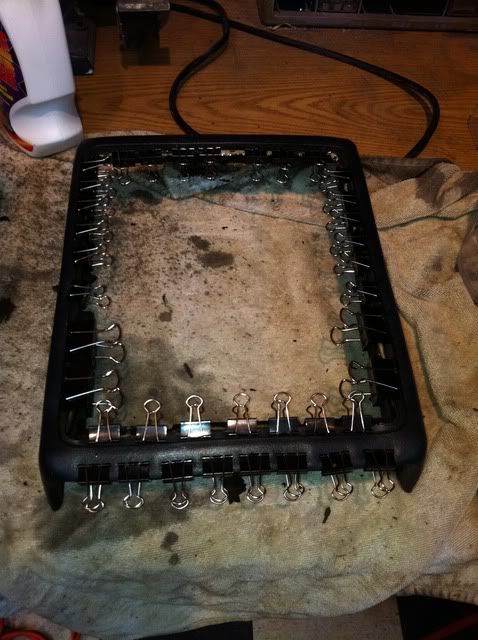
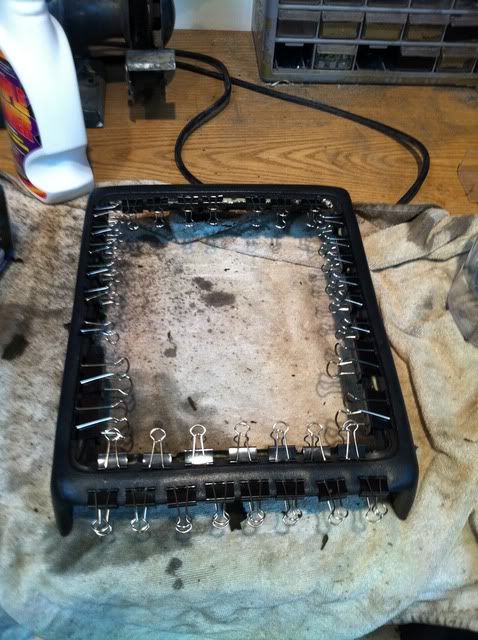
I am starting to get to the end of the glueing and clamping of the interior. It is turning out a lot better than I thought it would.
I don't remember where I saw the idea to use Gorilla Glue and those Office Style paper clamps but whom ever thought of it was a genious and I don't wanna take their credit for that.
It's really doing well to bring all that vinyl back into place, with maybe the exception of the Console door that is giving me a head ache pulling that vinyl around again.
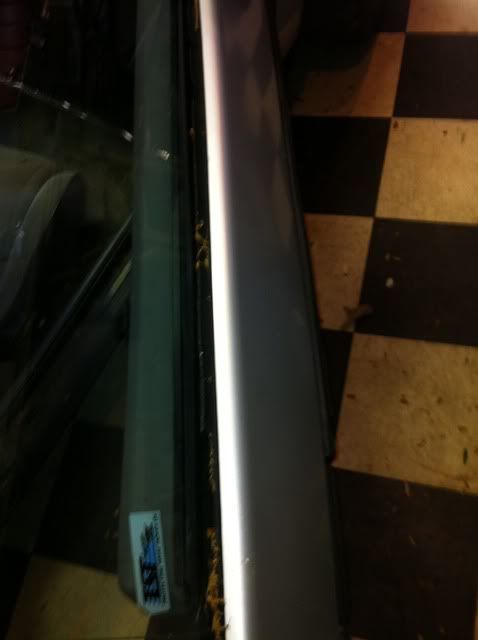
I also need to find out where to find the door glass seal. Both mine are trashed
Post by: jwrape on April 19, 2011, 10:36:15 am
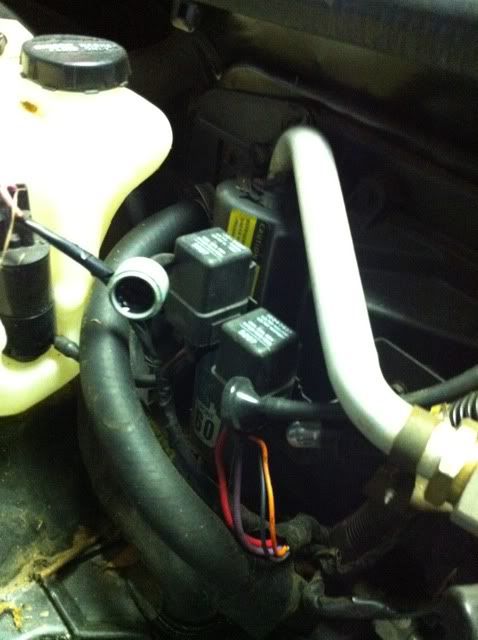
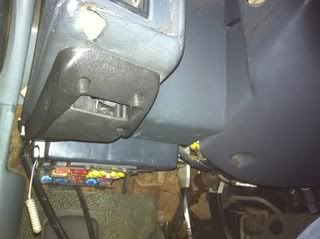
I also found out why it wouldn't turn over the engine at all with a battery in it. Come to find out, since the PO had stripped off the battery terminals I cound't tell that there was a main 12v+ connection as well as a secondary wire that should have been plugged up for the ignition. After messing around and looking around in the motor compartment I foun this loose wire from the power distribution box and connected it to 12v+ and everything came alive
After I connected it, I could turn it over.
After I used the EZ out to remove the broken spark plugs from the head, i scrounged up 4 plugs to see if I could get her to run.
Well with the ignition on the fuel pump wouldn't either pump fuel or there is no fuel in it. Either way i pour a little gas in the Throttle body and got it to run roughly for a New York minute. So I know if I can get fuel to her, she will fire.
I also found during all this, that the throttle body butterfly was stuck shut. I mean you could not move it at all, so I sprayed some PB Blaster on it and tapped it with a Screw driver and hammer and it broke loose and with the PB Blaster, worked itself back to normal function. Gas pedal will open and close the throttle body now.
I tell you, this car is in good shape to some aspects and BAD shape in others. But I love cleaning it up and gettin' it going.
My wife is being VERY cool about me working on the car. I think it has something to do with my recent surgery. She wants me to have my fun now. :-) Gotta love her for that one.
Post by: jwrape on April 19, 2011, 10:36:33 am
How it looked when i got it.
Post by: jwrape on April 19, 2011, 10:36:53 am
Post by: Fierofool on April 19, 2011, 11:02:12 am
The looped red wire in the front compartment is common to all Fieros. I don't know what it's for, but it's on my 87, 88, and my brother's 86. I just checked.
The unknown 'vacuum check' valve is a one way in-line valve for the windshield washer. It prevents the fluid from draining back from the spray nozzle so you get instant water when you use the washer.
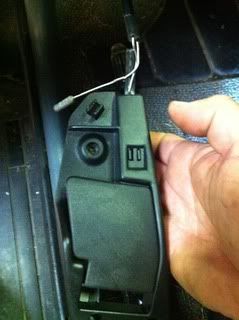
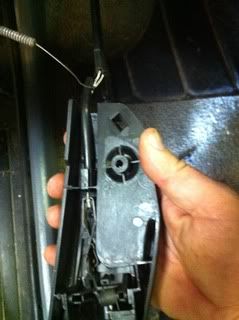
The backup front hood release cable: The large end of the spare cable snaps into the little clip on the release handle. In your 3rd to last picture, the end of the cable is close to its clip. It's just to keep it from hanging down.
I believe the Fiero Store has the door glass seal that goes around the outside of the door frame. If you're talking about the Dew Wipes located at the bottom of the window, they sell them, too, but DIY Stu on Pennocks actually produces a better product. I've heard that TFS copied DIY Stu's design but the quality of the material isn't as good.
Post by: jwrape on April 19, 2011, 11:12:08 am
All good information. Thanks for answering those questions for me.
I'll check out the Fiero Store and see what they got that I need. Prolly a lot.
Post by: Donster on April 19, 2011, 11:15:13 am
Seems like we have another expert amongst us ;D
\D
Post by: jwrape on April 19, 2011, 11:18:19 am
Wow, awesome thread you started here that other can benefit from alsoExpert, i don't know bout that. But I enjoy it and take pride in my work. and love taking pic to share.
Seems like we have another expert amongst us ;D
\D
Post by: jwrape on April 20, 2011, 06:57:21 am
Front inner and outer hub bearings
Front Bearing Seals
Distributor Cap and Rotor Button
Spark plug wires and Plugs
both tie rod ends for front end (they are thrashed)
Grand Am Brake Rotors and Calipers with pads (Original Rotors Milled down to fit inside New Rotors)
Fuel Filter
Fuel Pump
Fuel Pump strainer
Throttle Body rebuild kit
Fuel pump tank line (I've read I should replace this but haven't seen where to get one or what it looks like)
Battery
That should get me started.
Advance Autoparts is the cheapest I've found so far over all. About $462 total. BUT they don't stock it or can't order some of the stuff so I don't know why they list it for sale. Strange.
Post by: jwrape on April 20, 2011, 07:50:48 am
Is there a hose I need to replace while I have the tank down? If so, where do I get it?
Post by: oldone on April 20, 2011, 08:37:37 am
Post by: jwrape on April 20, 2011, 08:45:38 am
when buying from advance auto parts tell them you belong to GA FIERO CLUB and that you are supposed to get a discount, if they can't find it in their computer tell them to check with the dacula store or call fierofool. sounds like you really know what you are doing keep it up.
Oh cool. Thanks for the info. That should be helpful. I grew up in Dacula. Class of 94'. :-)
I will be abusing that store soon for the rest of the parts locally.
Um.... yea, I guess i do know a good bit. I am the guy all my friends lean on to work on their cars. My dad taught me all the basics growing up and I took off with the fuel injection side of things instead of the carburated. My Dad can make anything run that has a motor. I can pretty much fix anything I can take apart. I enjoy taking old things apart and making them new or better than new again.
I was the kid that didn't play football or baseball, I road motor cycles and evenutally worked on my car all the time. You learn what you love. i should have been a mechanic. I would have loved it.
Post by: Fierofool on April 20, 2011, 08:46:49 am
The club discount at Advance Auto Parts is only for those who have paid dues and become a member. You won't be able to get the discount, otherwise.
Post by: jwrape on April 20, 2011, 08:49:34 am
Jason, in case you haven't seen it yet, I posted on PFF with a link back to this forum for information on the fuel pump hoses. It's in the Tech section of this forum. If you don't have a NAPA store down there, just come up Hwy 11 into Winder. There's one on West Athens Street which intersects Hwy 11 in downtown Winder. Ask for Ken or Brian.
The club discount at Advance Auto Parts is only for those who have paid dues and become a member. You won't be able to get the discount, otherwise.
Ok, cool. I know where that Napa is. I kinda grew up around Winder as well. Especially since I live in Monroe off Hwy 81.
It sounds like all of us on here are fairly, if not really close to one another.
Oh yea, someone referred me to the fuel pump tech tip over there in the technical forum. I'm gonna use that when i replace the pump.Thanks
Post by: Fierofool on April 20, 2011, 08:59:42 am
Post by: oldone on April 20, 2011, 09:01:10 am
Post by: jwrape on April 20, 2011, 09:05:02 am
Actually, out here there's 88_4mula, myself and new members Jeffrey and Theresa in Auburn, TheDon and Duchess in Buford, Pat and Linda in Lawrenceville, cogcavi in Gainesville, Ashby and Lee in Snellville and Loganville and Conrad and Johnnie in Far South Loganville. Psychosurfer is in Athens but he's a loner. ThaDriver is in Commerce. Everyone else is somewhere else across North Georgia.
Wow! I saw a red notch yesterday on Hwy 85 about 5pm... First Fiero I've seen on the road in a LONG time.
My Uncle has a 88 GT LOADED with every option that originally belonged to my mom's X Boyfriend. My uncle had it for a year or so and wreceked it. Side swiped a tree after Hydroplaining. I had thought he twisted the frame but after talking with him yesterday it turns out it's just the right side panels. He also said that after keeping it covered for the past 6 years that the entire interior of the car is moldy.
I might still try to get that one from him and restore it. Leather and all the good stuff in it and only around 100k miles on the push rod motor. My mom's boyfriend used to baby it. Now it's not so hot but could be... with a lot of work. but for a 2 owner 88' might be worth the effort.
Post by: jwrape on April 20, 2011, 09:08:13 am
if you didn't get all the glue off the radio surround i've got 2 or 3 that aren't to bad, might need some glue and clips, just let me know.
Cool, thanks. I am still working on my interior. It is definately a LONG process to glue it back to normal. Couple of stages of clamping for each edge. I am hoping it turns out ok. I think the worst will be the console door. It was about to jump off the plastic by it self. It looks a little better now but I'm not finished with clamping enough to know if it will make it not.
Here's how it looked originally.
It was taking the most attention and clamping and I cracked the plastic trying to bring the vinyl and the plastic back together.
Post by: oldone on April 20, 2011, 09:16:44 am
Post by: jwrape on April 20, 2011, 09:24:47 am
maybe try heating the vinly with a hair dryer or heat gun or even put in a stove on low heat for just a minute or two. once you heat it you probably would have to work fast before it cools. i'm sure somebody has a spare door or you can find them in a salvage yard. i know there's at least 1 in our yard.
See, we used to have a AWESOME U-pick it. in Jefferson, GA, that had a few of them back when i was in College. Well since then they crushed it all and closed the yard. I don't know where any more yards are anymore.
Green Leaf I beleive are all newer cars and rediculously priced. Other than that there in Lance, but I haven't been over there in years either. Frankly the only other older car i have had in a while was my 87' Chrysler Conquet Tsi and I NEVER found those in a yard except back in my College days.
Finding a Fiero anywhere is getting a little harder. Like I said, I hardly see them anymore. BUT I am definately developing a love for them again now that I and rebuilding mine. I used to have a Black 84' sowhere around 1996 I think. I have a couple polaroids of it somewhere around the house. :-)
Post by: Fierofool on April 20, 2011, 10:33:22 am
Post by: jwrape on April 20, 2011, 10:36:06 am
I've hit that one in Jefferson a couple of times. On Hwy. 124? Jones I believe it was. There is one off Hwy 78 just before the Oconee county line. It's a couple of miles down Bradley Gin Road. Last I was there they had about 5 Fieros, including an 85GT. All of them sitting in briar patches.
The one off Hwy 78, isn't that Green Leaf now? they are WAY expensive..... Unless there is another place, if there is I will definately go looking.
Yea, that was Jones. They used to be great for spending a day looking around
Post by: Fierofool on April 20, 2011, 11:14:26 am
I just threw away the business cards for the other yard so I don't know their name. It's maybe a mile or a mile and a half on past Greenleaf. Bradley Gin Road runs off to the left of 78.
Post by: jwrape on April 20, 2011, 11:18:10 am
OH! you know what, i know exactly what you are talking about. i didn't realize that place was open. I'm gonna have to go looking. Are they a U-pull it or do they pull it for you? That place has always been interesting I just thought they were closed down.
Oh, now I'm happy..... I know where parts are.... Thank you... That's awesome.
Post by: jwrape on April 21, 2011, 06:53:10 am
http://www.youtube.com/watch?v=gnNltWd9DYc (http://www.youtube.com/watch?v=gnNltWd9DYc)
And here is the Brakes in process of being upgraded
http://www.youtube.com/watch?v=XB69BJQuqBM (http://www.youtube.com/watch?v=XB69BJQuqBM)
Here is the interior after I cleaned the carpet (the best I could). It's starting to look a little better. It's definately not perfect but I would have to replace a lot of the console to make it perfect again. Right now I am more worried about performance and estetics of the outside.

SOMEONE was a really bad smoker. look at all the burn marks in the carpet. Thank God for Floor Mats.


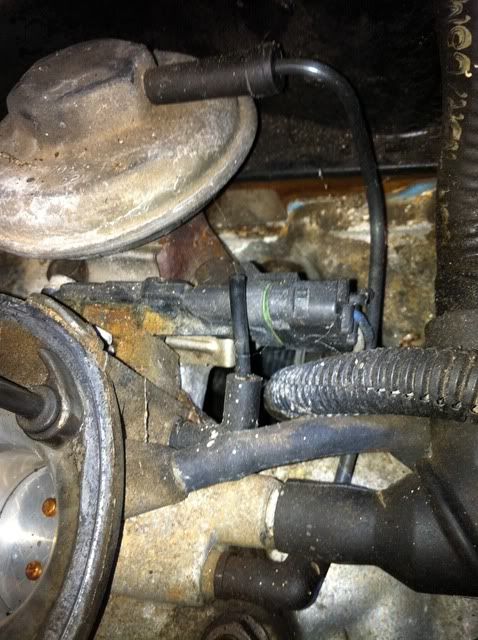
The Trunk where the plug goes to. I know where it plugs to the car, but when I pulled the trunk off it was connected and the wire follows through the trunk to the latch of the trunk. It is a Sport Fiero so there is no electronic latch or anything. The ONLY thing I can imagine is that it is to turn on a dummy light in case the trunk is ajar.


Found this "Rats Nest" behind the rear tail lights when I removed them. I was slightly scared of what I might fnd or what might bite me

I need to figure out if I should just cap this off OR find out what it actually went to at one time.

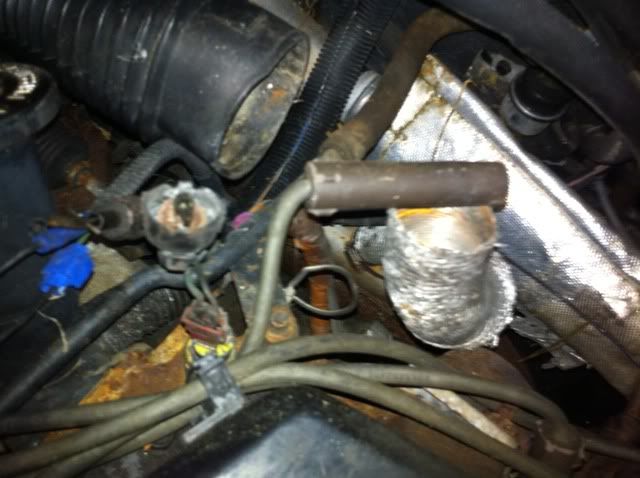
And now for the interesting picture. The pic below is the Coolant Temperature sensor that turns on the coolant fan on from. I had been searching for this things location for days now and finally felt around and found it beside the #4 plug location. Of course I couldn't see it with my eyes but fortunately I have a wonderful camera phone to see where most people cannot.

Now my question from the YouTube vodeo is simply can I relocate this CTS somewhere else in the system. Can I "Y" it off the front sensor on the Thermostat tube to get a proper temperture to turn on the fan or is there some other way? As you can see, tapping and EZ outing that plug will be impossible without pulling the motor. I would rather the sensor be connected properly but I suppose if I can't slightly modify the sensor to work properly I will be installing a after market temperture sensor and a toggle switch somewhere which I would hate and it would bother me every time I saw it cause it wouldn't look like factory. :-)
Post by: jwrape on April 21, 2011, 07:10:13 am
Post by: jwrape on April 21, 2011, 07:16:28 am
Quote
Originally posted by jwrape:
Just did a compression test
#1 - 115
#2 - 105 ish
#3 - 120
#4 - 120
So it seems I'm jus barely ok with #2 but great on the rest.
Ya know, I'm thinking I could get better numbers with a new battery. I got these with jumper cables from my Infiniti idling.
I'll try it later as well when I get a new battery in it and also have the battery connections on correct.
Post by: jwrape on April 21, 2011, 07:24:01 am
I now figure the reason it was parked was because of the fuel pump.
"The previous owner said it was running funny and then a Shade tree mechanic worked on it and it never ran again."
Now I see why it was running funny. The fuel pump was giving out.
I actually don't know if there is gas in the tank or not cause ever since I got the engine to turn over the gas gauge has been pegged. BUT when I first got the car it red half a tank, so I figure it has half a tank.
Post by: Fierofool on April 21, 2011, 08:30:17 am
Go through the car very thoroughly to check for rats nests. They all seem to know about the front hood latch opening and they like to build down underneath the cowl cover. There is a resister in the heating system that's accessible from the front compartment. Located near the blower motor. If there's debris in there, it could catch fire when you use the heating system. It has a coil of wire like a hot plate element.
The phantom vacuum line attaches to the bottom of the MAP sensor. If you need some of the hard line, I have some from which you might be able to construct a new piece.
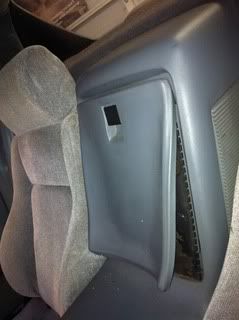
The plug on the decklid is for the trunk light and its switch. That's the switch you show on the latch. It also signals the AJAR warning light. I believe it also has the circuit for the electric trunk release. Rather than make 2 different harnesses, they just used the same. The plug for the release switch is behind the blank plate on the right of the instrument cluster.
The fuel pump problem could be a bad relay. The pump and AC relays are located on the firewall behind the driver, inside the engine compartment. The relays are interchangeable as a test. You should feel or hear it click when you cycle the switch. If it is good, you may also hear the pump cycle for about 2 seconds.
If you need a radio, I have several stock radios and also some late model Pontiac radios.
Post by: jwrape on April 21, 2011, 08:38:34 am
Not only were they a heavy smoker, but a dangerous one, too. There are burn marks underneath the seat that could have smoldered. If parked inside a garage, it might have burned down a house.
Go through the car very thoroughly to check for rats nests. They all seem to know about the front hood latch opening and they like to build down underneath the cowl cover. There is a resister in the heating system that's accessible from the front compartment. Located near the blower motor. If there's debris in there, it could catch fire when you use the heating system. It has a coil of wire like a hot plate element.
The phantom vacuum line attaches to the bottom of the MAP sensor. If you need some of the hard line, I have some from which you might be able to construct a new piece.
The plug on the decklid is for the trunk light and its switch. That's the switch you show on the latch. It also signals the AJAR warning light. I believe it also has the circuit for the electric trunk release. Rather than make 2 different harnesses, they just used the same. The plug for the release switch is behind the blank plate on the right of the instrument cluster.
The fuel pump problem could be a bad relay. The pump and AC relays are located on the firewall behind the driver, inside the engine compartment. The relays are interchangeable as a test. You should feel or hear it click when you cycle the switch. If it is good, you may also hear the pump cycle for about 2 seconds.
If you need a radio, I have several stock radios and also some late model Pontiac radios.
Wow, I love how you answer my questions so fast. :-) The Realays are clicking when the ignition is turned on but nothing happening in the tank. But I will swap them and see if that helps although I figure for the age of it, it's prolly just as well that I replace the pump before starting to drivie it.
The funny thing is I don't have a trunk light. It has a plastic block off plate where one would go. BUT I do have an extra one I can install from my dad ol' fiero he tore apart for the F355 build years ago
Post by: Fierofool on April 21, 2011, 09:11:36 am
Look on the left corner of the engine compartment and see if you have a couple of wires going into the trunk wall. If you do, the light harness is there.
You might be able to extend the harness and install the fan switch into the intake manifold. On the left side facing the trunk wall, there are several pipe plugs. The manifold has coolant running through it. I believe the coolant temp switch needs to be in direct flow to effectively control fuel mixture, so I wouldn't T off the thermostat neck.
Post by: jwrape on April 21, 2011, 09:27:01 am
The fast reply was just coincidence. I had just gotten my shower and was sitting down with my first cup of coffee. If the relay's clicking and the pump's not running, you're probably correct that it's toast.
Look on the left corner of the engine compartment and see if you have a couple of wires going into the trunk wall. If you do, the light harness is there.
You might be able to extend the harness and install the fan switch into the intake manifold. On the left side facing the trunk wall, there are several pipe plugs. The manifold has coolant running through it. I believe the coolant temp switch needs to be in direct flow to effectively control fuel mixture, so I wouldn't T off the thermostat neck.
Ok, that sounds like a good idea. I will look for a port to tap into. AND I will look for that wire harness lead for the trunk light, that would be nice to have
Post by: TopNotch on April 21, 2011, 09:33:09 am

It's behind the cigarette lighter plate (held on with two torx screws). Yours may be inverted from the picture (A and B may be on the lower left).
Pin G goes directly to the fuel pump. It does not go anywhere else, so anything you connect to it will not harm anything else.
Try connecting 12 volts to pin G (with the other wire to pin A, Ground). Listen for the fuel pump running.
(If you are using a charger to supply the 12 volts, watch the amp meter when you make the connection. If no current is drawn, your pump is open and will have to be replaced.)
If connecting 12v does not work try reversing polarity. Use a 12v charger, and connect the negative line to pin G, and the positive line to pin A. If that kicks it loose, try normal polarity and see if it runs.
If that doesn't work try connecting 24v (two 12v chargers in series) to pin G. Do this only briefly as the wires will get warm if the pump is frozen.
If none of that works, your pump is likely shot and will have to be replaced.
Post by: jwrape on April 21, 2011, 10:18:23 am
If your fuel pump is frozen, you could try to "kick" it loose by trying following. You will need to find pin G of your ALDL connector.
It's behind the cigarette lighter plate (held on with two torx screws). Yours may be inverted from the picture (A and B may be on the lower left).
Pin G goes directly to the fuel pump. It does not go anywhere else, so anything you connect to it will not harm anything else.
Try connecting 12 volts to pin G (with the other wire to pin A, Ground). Listen for the fuel pump running.
(If you are using a charger to supply the 12 volts, watch the amp meter when you make the connection. If no current is drawn, your pump is open and will have to be replaced.)
If connecting 12v does not work try reversing polarity. Use a 12v charger, and connect the negative line to pin G, and the positive line to pin A. If that kicks it loose, try normal polarity and see if it runs.
If that doesn't work try connecting 24v (two 12v chargers in series) to pin G. Do this only briefly as the wires will get warm if the pump is frozen.
If none of that works, your pump is likely shot and will have to be replaced.
I had forgot you could do that. I will have to give it a try. That's an easiy enough test to verify. Could actually be a fuse I suppose, if that direct power turns out to show the pump good.
Post by: Donster on April 21, 2011, 02:08:57 pm
Let me know if you come up short at the salvage yards
\D
Post by: jwrape on April 21, 2011, 02:17:34 pm
BTW: I have a few MAP sensors, some TB parts, to include injector and various engine parts
Let me know if you come up short at the salvage yards
\D
Wow! i need to just go through you garage. You have a little bit of everything. Just kidding
I will post up what I'm looking for as I go to see what you've got laying around. So far, most everything has to be new parts for now until I get it running and rolling. :-) Then i will focus on the other little items that drive me nuts in order of which bothers me the most.
I am going to grab some wheels and tires for REALLY cheap tonight, the wheels and tires it was sitting on where the steal wheels with hub caps. I just can't drive hubcaps.
So I got the wife's approval and she's driving me out to grab them in her truck.
My little car won't fit much of anything and I don't wanna get it dirty anyways.
I think the main thing I wanna find in a yard or a garage is the aero front end at the moment. Most of those sensors etc have to be new anyways.
I have so much to do for that brake upgrade just to get it back outside and pressure washed, then wet sanded and of course somewhere in there i will get it running with the other engine parts I've got coming too. It's fun, but as I go I find more things that need to be replaced. But parts are pretty cheap for the most part. And I'm loving building it into something
Post by: jwrape on April 21, 2011, 02:20:39 pm
That way I will get to the meets a little sooner in the Fiero instead of my other DD.
Post by: Donster on April 21, 2011, 02:24:08 pm
Most of those sensors etc have to be new anyways.
One MAP sensor is actually new, bought it and didn't need it, have it as a spare.
But you are correct, essentials first, cosmetics later
Stuff is here, you can also come by and browse - offer stands
\D
Post by: jwrape on April 21, 2011, 02:28:03 pm
Most of those sensors etc have to be new anyways.
One MAP sensor is actually new, bought it and didn't need it, have it as a spare.
But you are correct, essentials first, cosmetics later
Stuff is here, you can also come by and browse - offer stands
\D
Awesome, I certainly appreciate the offers. I will take you up on it eventually. I am looking forwar to the meets too since you guys are meeting right on my way home from work.
Post by: jwrape on April 22, 2011, 07:04:22 am
I got them home and lined them up and double checked the lug pattern to be 5x100 and the bore to be 56.1.... The wheels fit perfectly.


Then after laying the felt on my pool table I went out the shop for a wrench to put on the sides and had to throw on the back wheel to see what it will look like.
The offset is ALMOST flush with the top of the fender. I'm still not sure if I want to add another 10mm spacer since the front end will be another 9mm wider after the Beretta Brake Upgrade. I will test with the generic spacers I have and if I like it I will buy a set of hubcentric spacers to run on it.


Post by: jwrape on April 22, 2011, 07:27:12 am
Post by: jwrape on April 26, 2011, 05:56:28 am
Well I initially said it was the fuel pump, because they can be erratic when going bad. But I checked around and popped off the distributor cap and looked at the rotor. OMG! it was burned to a crisp in there, both button and cap. So I started to think that maybe it's so bad it's just not getting enough spark across the board.
So we went and got replacements. I swapped them on and it started and ran like a dream. Well, just to make sure we turned it off and on a few times. Then it quit again.
From there the only thing we could derive was the fuel pump. I crawled under the car and had a buddy turn the ignition to "on" to hear the pump. Nothing! I had him do it a few more times and finally it clicked on and you could hear it great and the car started perfectly. Wahlah, I had it figured out. I sent him up to the store for the $134 fuel pump and we swapped it out last night.
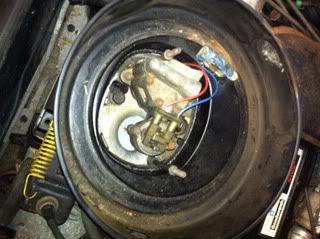
The two great things from this: Honda is genius for making the Fuel Pump accessable from inside the car. THANK YOU Honda.
Second, I got practice on replacing a fuel pump. The last one I did was when I was 17 in a 84 Trans Am. It;s been a while but it's like riding a bike.
Post by: jwrape on April 26, 2011, 06:05:58 am
Post by: Fierofool on April 26, 2011, 08:30:37 am
Post by: jwrape on April 26, 2011, 08:34:59 am
I'm sure you already know this, but for those who don't: When replacing the fuel pump on a Fiero, be sure you get one that is correct for your engine. The 4 cylinder pump won't supply enough for the V6 engine and the V6 pump will overpressure the 4 cylinder cars.
Yes, I verified it. It's Part Number AC Delco OEM replacement EP386. Shows on all the online infor that is made for my year and size motor. I should be good. Don't wanna over pressurize anything on the ol' girl. LOL
Post by: jwrape on April 29, 2011, 07:43:39 am

Then a friend and I proceeded to remove the gas tank. WOOO! That was fun, for the main reason of all the Acorns and leaves and dirt falling in our eyes. Oh, and the fuel lines are not easy to get to and get off. But we did and after removing the fuel pump instantly found why the PO said it was running funny. Look at these photo's and the nastiness that had become of the hose.


The hose was a sticky, rubbery mess and litterally was just sitting there only because there was no movement to it in the tank. After I tried to pull it off I got this.

And that stuff got on EVERYTHING on my work bench.
Then I wanted to see if the tank was rusty or dirty so I stuck my phone inside and took some pics
Just a couple specs of rust that I eventually wiped out

Then I saw this and thought it was funny. It's cracked but when I stuck my hand in to feel it, it's not brittle and wouldn't come off like I would have assumed so I just left it.


Then we dumped the nasty 5 year old gas as we choked on the smell that still reaks throughout the yard even though it's long gone.
We rebuilt the pump with the new pump, new Real Clamps and real double resistant fuel line inside.
We took apart the float mechanism and lightly cleaned it til it had a shine on the coiled wire and the slider. (afterwards the Fuel Gauge is still pegged at FULL.
We had the tank back in with the new fuel pump and the pump works perfectly. We go to start it and figured out that the wires were on totally off from the 1-3-4-2 order they should been in. So after some reading we figured out which wire is #1 and once they were in order the motor fired up.
At first it ran rough and even shot out a hay bale from the tail pipe. Something was living in there at one time

After a little smoking through the PCV valve and a lot of blow by, some smoking out the tail pipe due to oil in the cylinders, it started running smoother and smoother. Eventually it ran like a Honda, Very Smooth.
THEN, all the sudden it started running rough and spiratically making this knocing noise but I could tell it wasn't a ROD because it was very spiratic and wasn't exactly with the rythm of the motor. Then finally we lost a cylinder firing.
I'm like, OH SH**! I think I trashed the motor. (Yes, I admit it, you guys were right, I should have pulled the head but I REALLY didn't want to. I was stubborn)
So the next day I pulled the head off. Here is what I saw.

Here is the #4 cylinder that had a broken plug in it.

Seems to be NO problems with this cylinder at all.
Next I looked at #1 and didn't see anything obvious

Then I wiped it out and looked closer and saw this

Dings all over two sides of the cylinder, mainly close the rear window side of the piston and close to the trunk, no marks on the right or left of the piston.
And here is a closer look with it at TDC

So I cleaned and cleaned and cleaned some more.
Then I dried it out and blew it out with compressed air.
Then I went over to the head hanging from my motor lift and checked it out for damage. Nothing really notable there.

Then I try my hand at removing the Coolant Temp Sensor from the head with a EZ out. That Failed as I figured it would. So now instead of a rusted CTS locked into the head, I also have a EZ broke off in it as well. Getto I know, but I don't know how to get out a EZ out. You can't drill through them. Luckily it sealed the water chamber back up.


So anyways, I got the head back on the car and reassembled it. Hoping and crossing my fingures the whole time that I didn't damage it to much.
I got it all back together and turned it over a few hundred times with it spittin' and spuddering and then it finally cranked and ran PERFECT. It is back to running like a foreign car again. Suprisingly smooth and healthy.


And then here is the Video of it running
http://www.youtube.com/watch?v=w3NwY6btEdU (http://www.youtube.com/watch?v=w3NwY6btEdU)
Post by: jwrape on April 29, 2011, 07:53:13 am
During my work this weekend I was looking for an alternative place for the Coolant Temperature Sensor. There is one un used space behind the Coil in the head that can remove the cap and use a adapter to add the sensor there or there is another unused spot on the intake.


I am wondering if either of these will work for that sensor cause the original place will never work again. :-)
During my head removal there is a small hose from the bottom of the intake to the rear wall of the engine bay. I ripped it apart as I removed the head and just happened to have this new Heater Core Hose from working on my Conquest Tsi that worked even better that the original.

Post by: TopNotch on April 29, 2011, 09:25:05 am
Post by: jwrape on April 29, 2011, 09:27:10 am
The swollen little gas hose on the fuel pump is because immersible hose wasn't used. If your replacement wasn't immersible, it will do that also.
Yea, I used the immersible one this time. I went to Napa and got a little piece. Goes to show, you gotta do it right.
Post by: Fierofool on April 29, 2011, 10:28:53 am
Jason, you're moving right along. That's looking good.
Post by: jwrape on April 29, 2011, 10:32:10 am
Post by: Donster on April 29, 2011, 10:38:46 am
Awesome thread!
\D
Post by: jwrape on May 03, 2011, 07:44:01 am
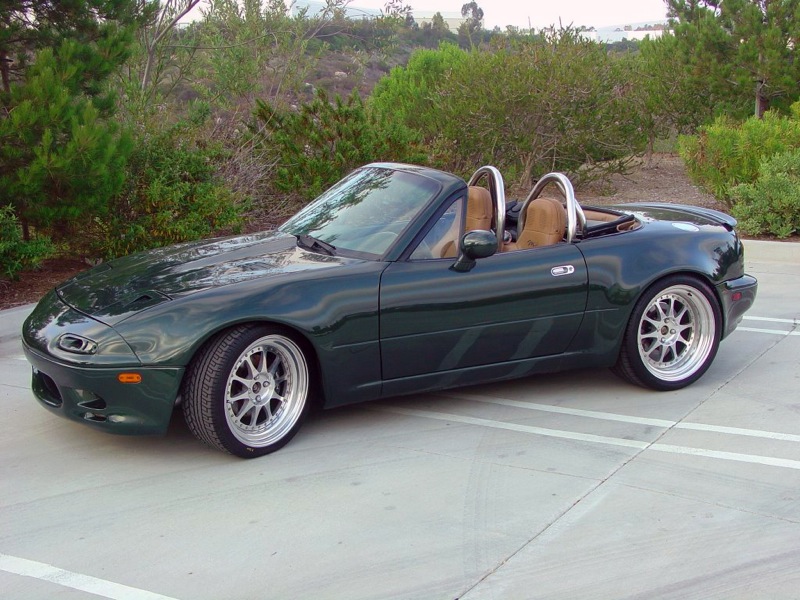
Man Jason, you really are going the whole nine yards on this, eh? And seem to be doing it right also.Thanks, I am jumping into it so hard because I wanna drive it for one but I need to save on gas. My G35 only gets around 20mpg. I need to save more and also after I get this driving I will get my wife driving the G35 instead of her 13mpg Navigator and I will save up for her toy and my next semi build, a Widebody Miata that gets close to 40mpg.
Awesome thread!
\D
Here is what it will look like with the body kit.
Post by: jwrape on May 05, 2011, 12:55:15 pm
I will post pics later.
Should be getting on those brakes soon. Now I gotta pick up the calipers and pads.
Post by: jwrape on May 06, 2011, 07:46:28 am
One of them, the machinist was cutting it from the front and a chunk of steel flew off and nearly took off his head. LOL!
So he had to weld back on some material and machine it back down.
They turned out great.
The learning from this is to turn off the disc from the hub from the rear of the hub first so that the weak part of the steal doesn't go flying at your head.
The second one turned out perfect and now he's got it down.
I'm gonna have him do another set here soon if I get this 86' GT I'm looking at.


Post by: TopNotch on May 06, 2011, 09:55:36 am
The kit is very reasonably priced, considering all you get with it. It makes the conversion a simple bolt-on procedure.
Post by: jwrape on May 06, 2011, 10:01:23 am
A bit late now, but did you know that the Fiero Store sells a kit that has everything you need for this brake conversion? The kit includes turned down rotors with new bearings, disks, calipers, brake pads, and caliper mounting brackets. (The caliper mounting brackets need a bit ground off at one place where they would otherwise rub against the new disks.)
The kit is very reasonably priced, considering all you get with it. It makes the conversion a simple bolt-on procedure.
Yea, I think I remember seeing it, but I have less spending money at different times of the month so I was just collecting the parts as i go a long. Just to not spend a ton of money all at once. So far i think I have something like $257 in the car since I started taking it apart. Not to mention the $400 for the car itself. But so far I haven't spent all that much for parts and I need about another $400 + alignment to get it rolling down the street. Not to bad for a gas saver. :-)
Fiero's remind me of a VW Bug in the way that the parts are pretty cheap and they are easy to work on. The Fiero Looks 10x better though to me.
Post by: Fierofool on May 06, 2011, 01:39:44 pm
Post by: jwrape on May 06, 2011, 01:45:26 pm
The Fiero Store has the parts, AND if you're a dues paying member of the Georgia Fiero Club, you get a discount from them.
I plan to become a member soon.
Post by: oldone on May 06, 2011, 04:06:19 pm
Post by: Tha Driver on May 06, 2011, 04:21:37 pm
~ Paul
aka "Tha Driver"
Custom Fiberglass Parts (http://angelonearth.net/customfiberglass/)
Post by: Fierofool on May 06, 2011, 04:57:31 pm
Post by: Tha Driver on May 06, 2011, 09:25:06 pm
It's already sold. I bought it and have a motor that will be coming soon.That's what I get for not coming to club meetings. So do you need to put the engine in here?
~ Paul
aka "Tha Driver"
Custom Fiberglass Parts (http://angelonearth.net/customfiberglass/)
Post by: Fierofool on May 06, 2011, 11:35:40 pm
Post by: jwrape on May 07, 2011, 06:42:08 am
jason whats the 86gt you're talking about?
Well, I found a guy that's interested in trading my Zero Turn Mower for his car. He's coming over today with the car to see if he wants to trade. Might be cool to get another Fiero. We will see. You know I will let you know. :-)
Seen here
http://gafieroclub.org/bbs/index.php?topic=768.0 (http://gafieroclub.org/bbs/index.php?topic=768.0)
Post by: jwrape on June 07, 2011, 02:03:44 pm
Fingers crossed i ordered the right stuff.
Post by: jwrape on June 14, 2011, 06:44:06 am
Looks good so far.


A little detailing makes everything look a little cleaner.


And then a little stand back photo. I have the rear wheel just hand tightened on cause I still have to bleed the brakes before I mount them and set it down on the ground again.

Post by: jwrape on June 21, 2011, 06:25:52 am
I finished the brakes and she started right up and I ran it up and down the road for the first time.
It runs perfectly so far.
Need to get it aligned and insured and then I can drive it to work and get a feel for it. The only thing is even after cleaning the mechanism in the tank, the gas gauge stays pegged at full. That might be a challenge to drive without a gas gauge. I will have to see what kind of mileage it gets and figure it up by the miles on the odometer.

Post by: jwrape on June 21, 2011, 12:55:39 pm
Gotta fill and smooth the luggage rack holes and find a cheap spoiler for the back. I think it REALLY needs a Spoiler.
Looking at the car. I am thinking it SHOULD theoretically be lower in the front. It might need to settle. I have only driven in my neighborhood.
I'm about to put insurance on it and go get it aligned. That ride will get it settle prolly.
Post by: Fierofool on June 21, 2011, 01:33:44 pm
This package includes the $30 Fiero installation kit or if you find your own radio, they sell the installation harness which is plug and play, no splicing or cutting of the stock harness.
http://replacementradios.com/product_info.php?cPath=21_42_201&products_id=74
Post by: jwrape on June 21, 2011, 01:37:56 pm
Staggered tire sizes would help change the rake a little. The car looks great. If you can't find a decent radio at pull-a-part, you can get them at www.replacementradios.com Costs about 10 times what I got mine for at the yard. Crutchfield.com and Replacement Radios carry stuff for the Fiero.
This package includes the $30 Fiero installation kit or if you find your own radio, they sell the installation harness which is plug and play, no splicing or cutting of the stock harness.
http://replacementradios.com/product_info.php?cPath=21_42_201&products_id=74
Actually the car came with a aftermarket radio harness plugged into the factory harness but I have seen the AC Delco CD players with the Ipod plug in the side for $125 on Ebay. Seems like a good deal. Then just have to get some speakers and I'm set with that.
i don't use CD that much cause my phone has all the music I want. So as long as the Ipod adapter works I'm happy.
Yea, I will probably run 225/60/15's on the rear and 215/60/15's on the front.
Right now there are 225/65/15's on it and they are right to the outer edge of the rear fender so i don't think I can get much wider than MAYBE a 235/60/15
The front is now 9mm wider on each side from the brake upgrade. The rear is the same as factory cause the discs just replace the originals..
Post by: Fierofool on June 21, 2011, 01:54:12 pm
Post by: jwrape on June 21, 2011, 02:03:49 pm
The 265/50/15 is almost the same overall height (within a tenth of a inch) as a 225/60/15, but it's wider.
The 60 series is a full inch taller so it would register a little difference on the odometer.
I am glad that I can fit the 265 under there, I might give that a try.
I use the online Tire Calculator here to get as close to factory size without throwing off the odometer.
http://www.miata.net/garage/tirecalc.html (http://www.miata.net/garage/tirecalc.html)
Post by: Fierofool on June 21, 2011, 03:40:10 pm
Post by: Donster on June 21, 2011, 03:43:12 pm
See TheDon's 85JeeTee pics.
Yep - awesome look! ;D
Post by: jwrape on June 24, 2011, 07:54:16 am
The 265/50 won't fit under the Fiero on stock rims unless you do coil-overs. Its inside sidewall will scrub.
Oh, so what about a 245/55/15? Prolly just barely slide by.
Post by: Fierofool on June 24, 2011, 02:13:34 pm
Post by: jwrape on June 24, 2011, 02:17:50 pm
Post by: jwrape on July 09, 2011, 01:02:40 pm
But I found it runs good and rides much smoother than my G35 Coupe, seriously. My GT is a nice ride too.
I cleaned the trunk carpet that had MANY, MANY stains on it and now looks perfect. Can't even tell there was a stain. I love that plastic carpet.
Also wet sanded the roof to start getting the car ready for paint. I found there are a couple little nicks in the roof I will have to spot puddy, but it's really just the perfectionist in me.
Just like my GT, I am picking one project on the car at a time. Right now is wet sanding and getting it ready.
It's mostly ready to drive to work, except for an alignment and a Tag (already insured).
Post by: jwrape on July 12, 2011, 06:14:02 am

Post by: jwrape on July 21, 2011, 07:40:49 am
Just a couple pics to stare at. Gotta love pics

The ol' girl does have a good stance and profile to be so old. Needs a spoiler though.

Currently wet sanding the rough, dead paint.
Post by: jwrape on July 28, 2011, 07:41:56 am
I tried it a few different ways and the best way I found was to pump up the pedal and hold it and then vide grip the push rod into full extention and pump it up further and bleed it over and over with the rod fully out, It would get hard but when I went to use it, it had air in it again. PAIN
Post by: Fierofool on July 28, 2011, 08:29:25 am
Pumping the clutch to bleed it can blend and scatter the air bubbles into the fluid. I use a variation of the gravity bleed method. Lifting the left front of the car to a point the wheel is about 4-6" off the ground, open and top off the master cylinder. Leave the top off the brake fluid and the master cylinder. Go to the rear and open the slave bleeder. You can tap on the slave lightly to dislodge any air that may be stuck at the pushrod end. Watch the master cylinder and refill about 3 times, each time before the fluid reaches the bottom. After the 3rd refill, as the fluid reaches the FULL mark on the reservoir, go to the rear and close the bleeder valve.
If you rebuild the slave, you can cap the fluid line with a vacuum cap found on the HELP rack. Then when reattaching the rebuilt slave, you can use the gravity bleed method by just holding the slave in a vertical position to bleed the air before installation.
This is a one-man method and requires only a jack and a wrench. You can eliminate the jack if you have an incline where you can park the left front wheel straight uphill of the right rear, at a 45 degree angle.
Sometimes it takes a while to get the MR2 rebuild kit. I waited on Advance for about 3 weeks before they told me the one they had in Virginia had been sold. I have one I can loan. You can order one and when it comes in, repay me. That way you'll get the Sport on the road quicker.
Post by: jwrape on July 28, 2011, 08:40:37 am
Have you checked for fluid leaks at the backs of the master and slave cylinders? If you get air from the slave right away, I'd say that's the problem. Get the slave rebuild kit for the Toyota MR2 as described in TopNotch's article in the Tech section.
Pumping the clutch to bleed it can blend and scatter the air bubbles into the fluid. I use a variation of the gravity bleed method. Lifting the left front of the car to a point the wheel is about 4-6" off the ground, open and top off the master cylinder. Leave the top off the brake fluid and the master cylinder. Go to the rear and open the slave bleeder. You can tap on the slave lightly to dislodge any air that may be stuck at the pushrod end. Watch the master cylinder and refill about 3 times, each time before the fluid reaches the bottom. After the 3rd refill, as the fluid reaches the FULL mark on the reservoir, go to the rear and close the bleeder valve.
If you rebuild the slave, you can cap the fluid line with a vacuum cap found on the HELP rack. Then when reattaching the rebuilt slave, you can use the gravity bleed method by just holding the slave in a vertical position to bleed the air before installation.
This is a one-man method and requires only a jack and a wrench. You can eliminate the jack if you have an incline where you can park the left front wheel straight uphill of the right rear, at a 45 degree angle.
Sometimes it takes a while to get the MR2 rebuild kit. I waited on Advance for about 3 weeks before they told me the one they had in Virginia had been sold. I have one I can loan. You can order one and when it comes in, repay me. That way you'll get the Sport on the road quicker.
Oh, definately gonna try the gravity bleed method. Sounds a lot better of a method to illiminate air out of the system. i need to get the old fluid out anyways.
I'll go and look at the MR2 rebuild kit in the tech section
Post by: TopNotch on July 28, 2011, 10:01:52 am
Sometimes it takes a while to get the MR2 rebuild kit. I waited on Advance for about 3 weeks before they told me the one they had in Virginia had been sold. I have one I can loan. You can order one and when it comes in, repay me. That way you'll get the Sport on the road quicker.
You no longer have to hunt for the MR2 kit. Rodney Dickman sells a dual seal rebuilding kit (http://rodneydickman.com/catalog/product_info.php?cPath=61&products_id=287) with not only the dual seal piston, but also the correct spring and boot. And he has them for all Fiero slaves, not just the Isuzu slave.
Post by: 85GT on July 28, 2011, 10:27:21 am
Post by: jwrape on July 28, 2011, 10:29:44 am
My 85 GT had the same problem in january, turned out to be the master cylinder bleeding by internally...
That's entirely possible in my case as well
Post by: jwrape on August 03, 2011, 08:28:55 am
Post by: jwrape on September 28, 2011, 07:58:36 am

Post by: jwrape on October 11, 2011, 08:35:01 am
The slave bleeds down when not driving. It pumps right back up but bleeds down when sitting, so I will fix that. :-)
Post by: redraif on November 16, 2011, 11:14:30 pm
Ended up cracking the center console door
I am starting to get to the end of the glueing and clamping of the interior. It is turning out a lot better than I thought it would.
I don't remember where I saw the idea to use Gorilla Glue and those Office Style paper clamps but whom ever thought of it was a genious and I don't wanna take their credit for that.
It's really doing well to bring all that vinyl back into place, with maybe the exception of the Console door that is giving me a head ache pulling that vinyl around again.
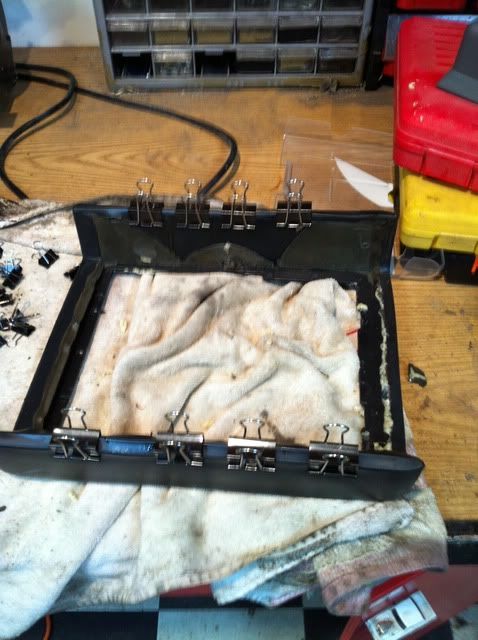
sorry for the late post on this part.... But maybe it will help someone...
lol @ the binder clips... And here I thought I was the only one who used them.....

One extra thing you can do is use a flat thin piece of wood b/w the clips and the outside when reattaching the outer wrap like that. It will ensure you don't get any bumps in the final product....
you can see the use of wood here on my bird's page http://www.cardomain.com/ride/659142/1987-pontiac-firebird/page-15 (http://www.cardomain.com/ride/659142/1987-pontiac-firebird/page-15)
Post by: jwrape on November 30, 2011, 08:48:35 am